Rack-mounting the NG Box
With the rack-mount kit, the NG Box can be affixed to rack posts. If this kit was not included with your NG Box, please contact your GFI Sales representative to purchase one.
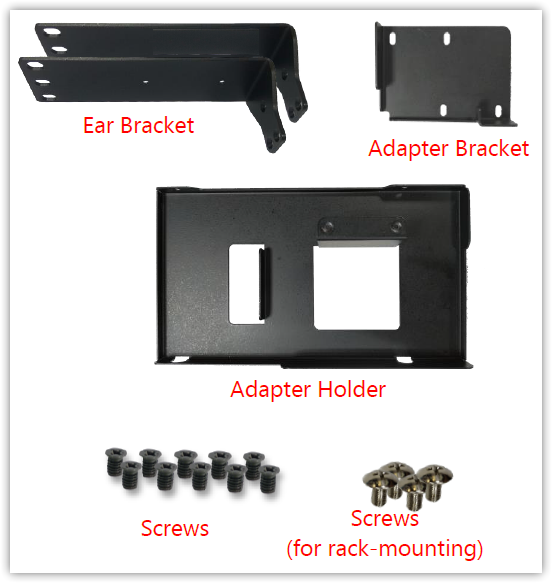
What is Included in the Rack-mount Kit
The kit will usually include the following items:
- 2x Ear Bracket
- 1x Adapter Bracket
- 1x Adapter Holder
- Screws for the Bracket and the Holder fixture
- Rack-mounting Screws
Attaching the Assembly to the Chassis
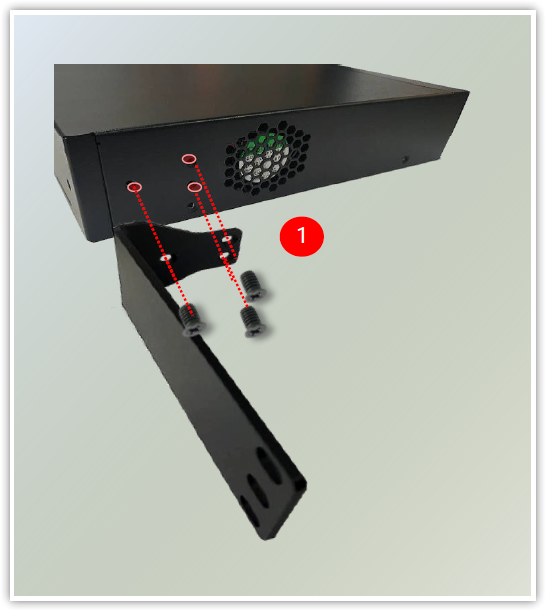
- On one side of the NG Box, align the ear bracket to the screw holes on the side panel and affix it using 3 screws.
- Secure the remaining ear bracket to the other side of the NG Box.
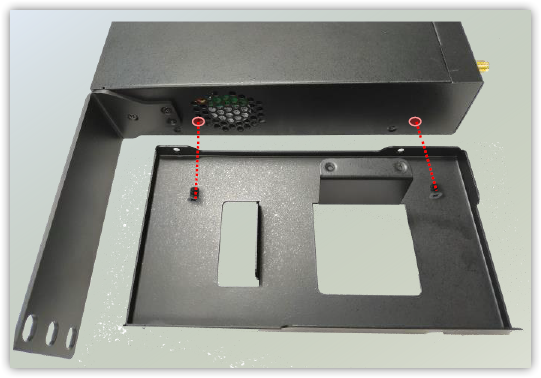
- Fix the adapter holder to the left side panel using 2 screws.
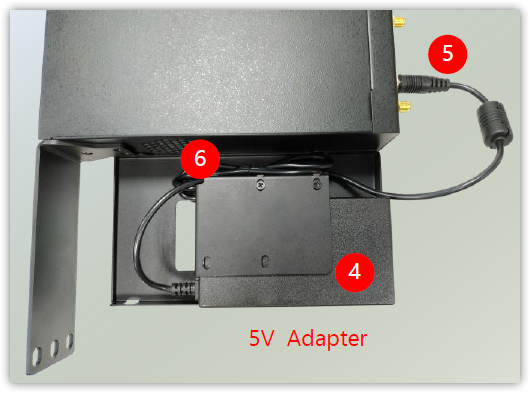
- The adapter holder assembly is designed to secure a 5V adapter. Secure the adapter onto the holder with the adapter bracket and 2 of the provided screws. Make sure the way you place the bracket is as shown in the pictures.
- Attach the power adapter’s connector to the power supply jack on the NG Box’s rear panel.
- Secure the adapter’s cable onto the adapter holder.
Installing the NG Box in the Rack
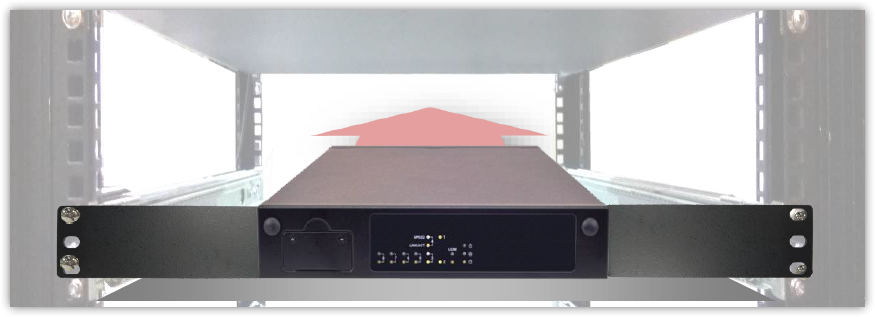
It is recommended to first install a shelf in the rack to support the NG Box. Then hold the NG Box with its front facing you, lift and carefully insert it into the rack. Attach the brackets to the rail rack using rack-mounting screws and retainer nuts (if applicable).
Wall-mounting the NG Box
With the Wall-mount Kit, the NG Box can be affixed to a wall. If this kit was not included with your NG Box, please contact your GFI Sales representative for purchasing this kit.
What’s in the Wall-mount Kit?
The kit will usually include the following items:
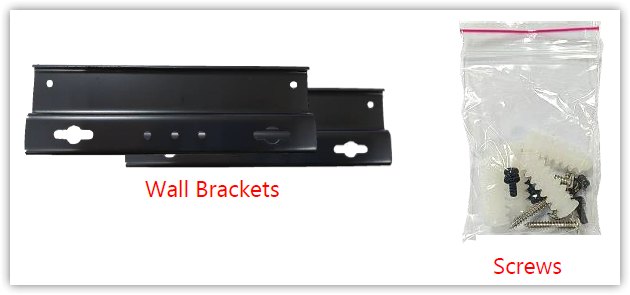
- 1x pair of Wall Brackets
- 1x Screw Pack
Installing the Wall-mount
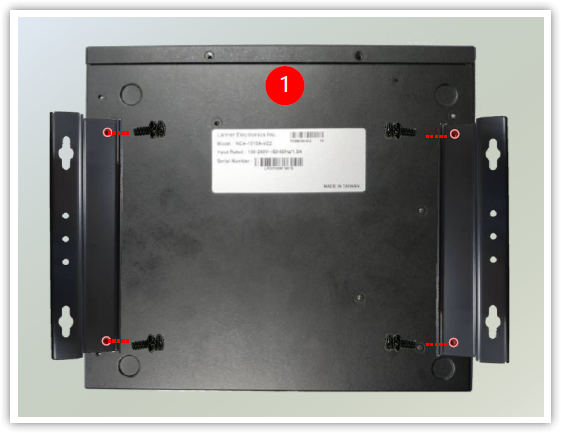
- Flip over the NG Box and affix both wall brackets to the bottom with 4 screws as shown in the picture.
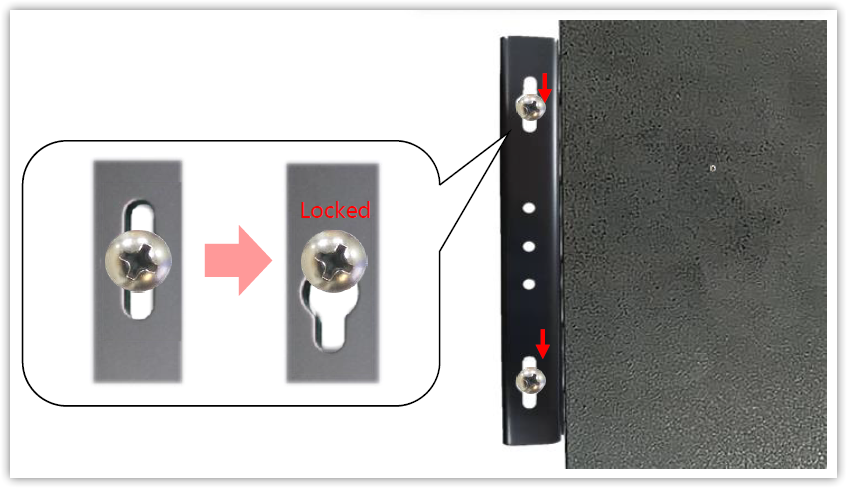
- Choose the place on the wall where you want to hang the NG Box and drill four holes to align with the uppermost spot of each wall bracket hole (check the Locked position in step 5 to understand the final position the NG Box will have).
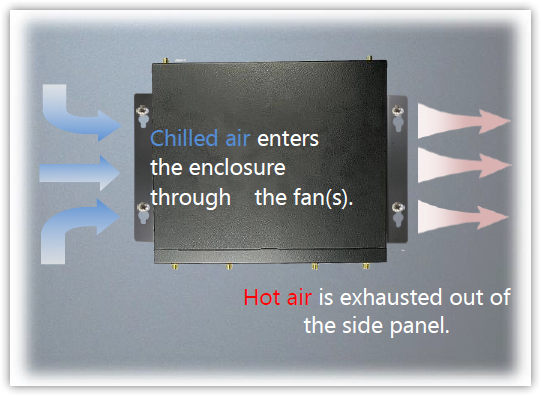
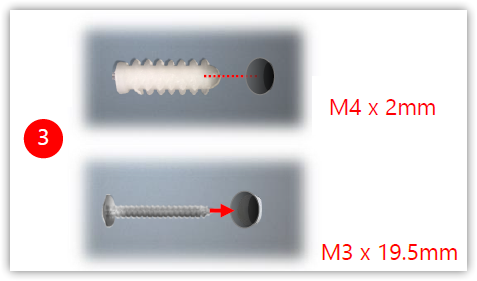
Important note: Make sure you make enough room for the NG Box’s intake and exhaust airflow by removing obstructions and/or through proper cable management. - Insert the wall plugs into the holes, and then insert the long screws into the wall plugs leaving a little space between the head of the screw and the wall.
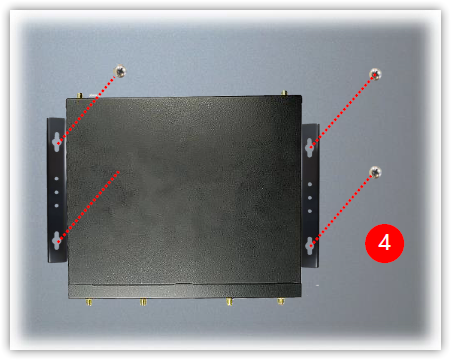
Important Note: The demonstrated screw type can fit in general drywall. Please identify your wall type and select a suitable approach to affix this NG Box. Consult a qualified professional if you are unsure. - Align the four NG Box bracket holes with the four screw heads protruding from the wall.
- Push the NG Box towards the wall so that the four screw heads pass through the middle of each bracket hole, and then push the NG Box downwards to lock it into position.

Priyanka Bhotika
Comments