Overview
If you do not want to use the automatic configuration of IP ranges, you can switch to the manual mode. However, note that changes of interfaces in the Trusted/Local Interfaces, Guest Interfaces, and Other Interfaces groups, e.g., adding a new interface, changing IP addresses, etc., require a manual update of address scopes defined in the DHCP server. Only one range can be set for each IP subnet.
This article provides the required steps to set the manual configuration of scopes and reservations in Kerio Control.
Solution
-
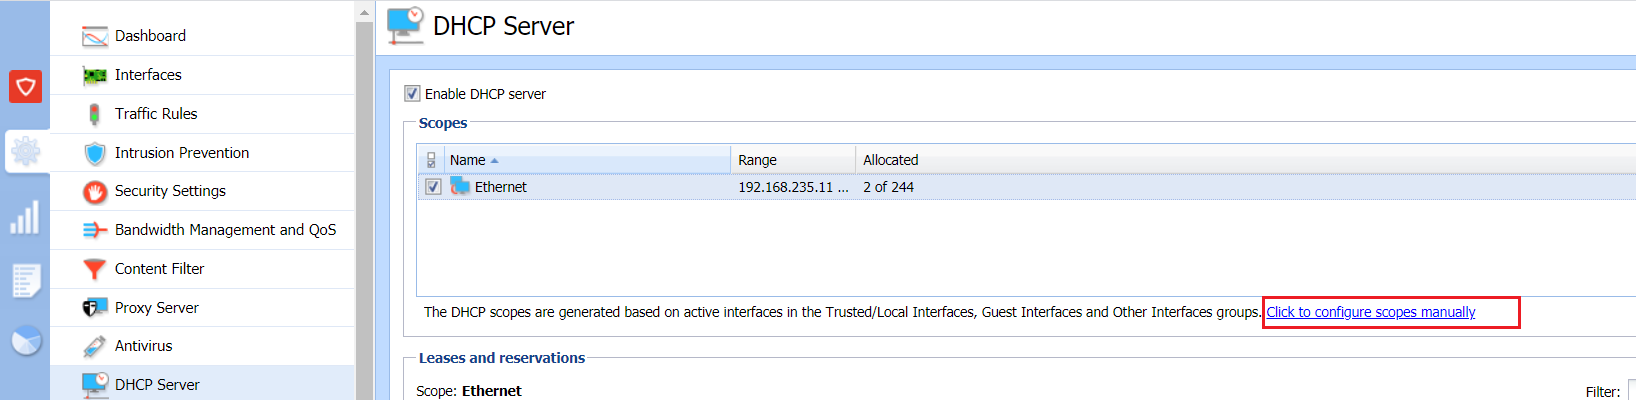
In Kerio Control's administration interface, go to DHCP Server.
-
Click on the Click to configure scopes manually link and confirm the change.
-
Confirm the DHCP warning about switching to the manual mode. Click Yes to proceed.
-
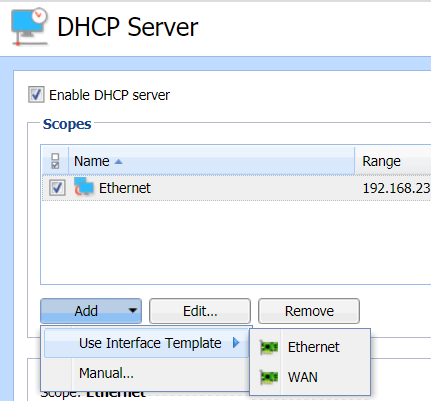
Optionally, in the administration interface, you can use Add > Use Interface Template if the particular firewall's interface already predefines parameters.
-
Click on Add and then Manual.
-
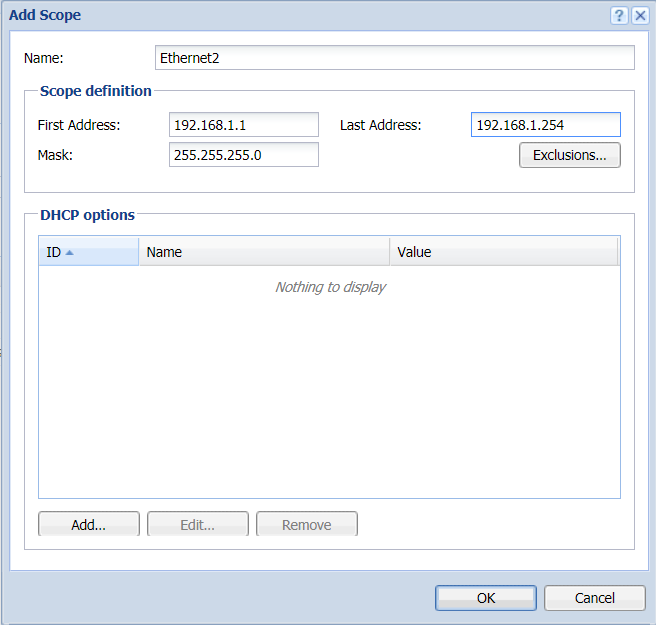
In the Add Scope window, type the name of the new scope.
-
Define the first and the last address of the scope.
-
Define a broader scope than the real number of users within the subnet.
-
Type a subnet mask for the appropriate subnet.
-
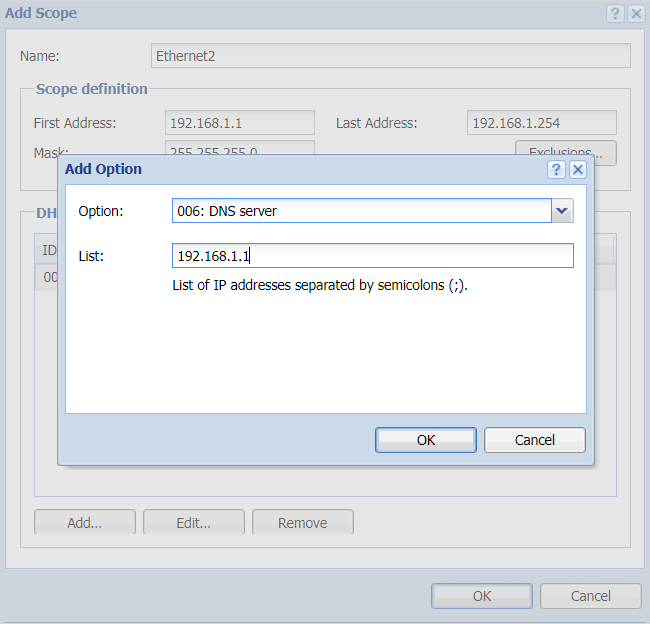
In the DHCP Options table, click Add.
-
Select 003: Default Gateway and then type the IP address.
-
Select 006: DNS server and type the IP address where Kerio Control is running. You can type any DNS server (or DNS servers separated with semicolons). However, it is recommended to use the Kerio Control host's IP address as the primary DNS server, i.e., at the top. The DNS module can work with the DHCP server to always use the correct IP addresses to respond to requests on local hostnames.
-
You can add several optional parameters, such as:
Parameter
Description 015: Domain name The local Internet domain (not to be used for specification of Windows NT domain name).
066: TFTP server name The name or IP address of a TFTP server. TFTP protocol is used by Kerio Operator to autoconfigure telephones.
-
Save the DHCP parameter.
-
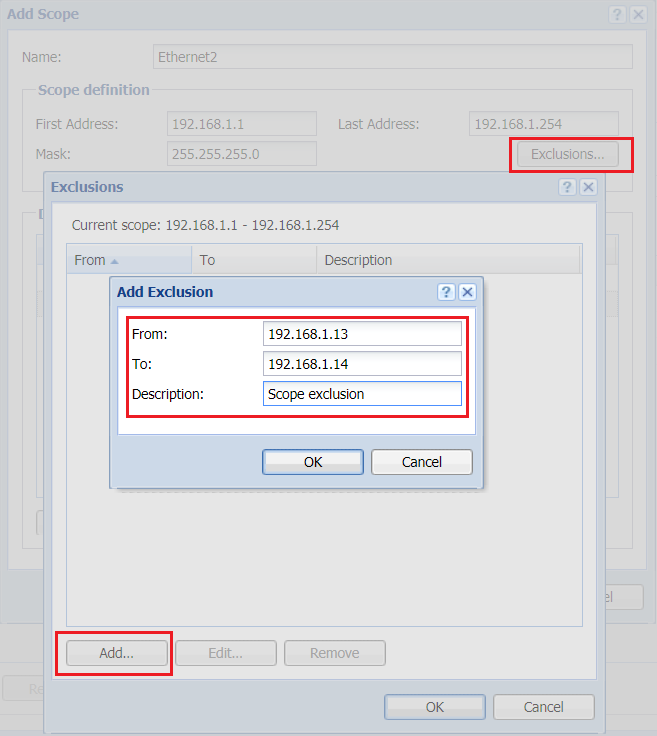
To create more individual scopes, click Exclusions and configure the exceptions as you see fit.
- Create the scope from
192.168.1.10to192.168.1.100and click on the Exclusions button to define the scope from192.168.1.13to192.168.1.14. These addresses will not be assigned by the DHCP server. -
Select Enable DHCP server.
-
Save the changes.
-
If you need to create additional scopes, repeat this procedure from step 4.


The way to work around this will be to generate DHCP scopes automatically in the HA configuration. When using Automatic Scopes, the default Gateway & DNS server IP addresses should be the "virtual IP address" for the clients. Please refer to the article on Automatic Generation of DHCP scopes for more details. You can make the switch by Clicking “Generate Scopes Automatically” option from DHCP Server settings.
Priyanka Bhotika
Comments