Overview
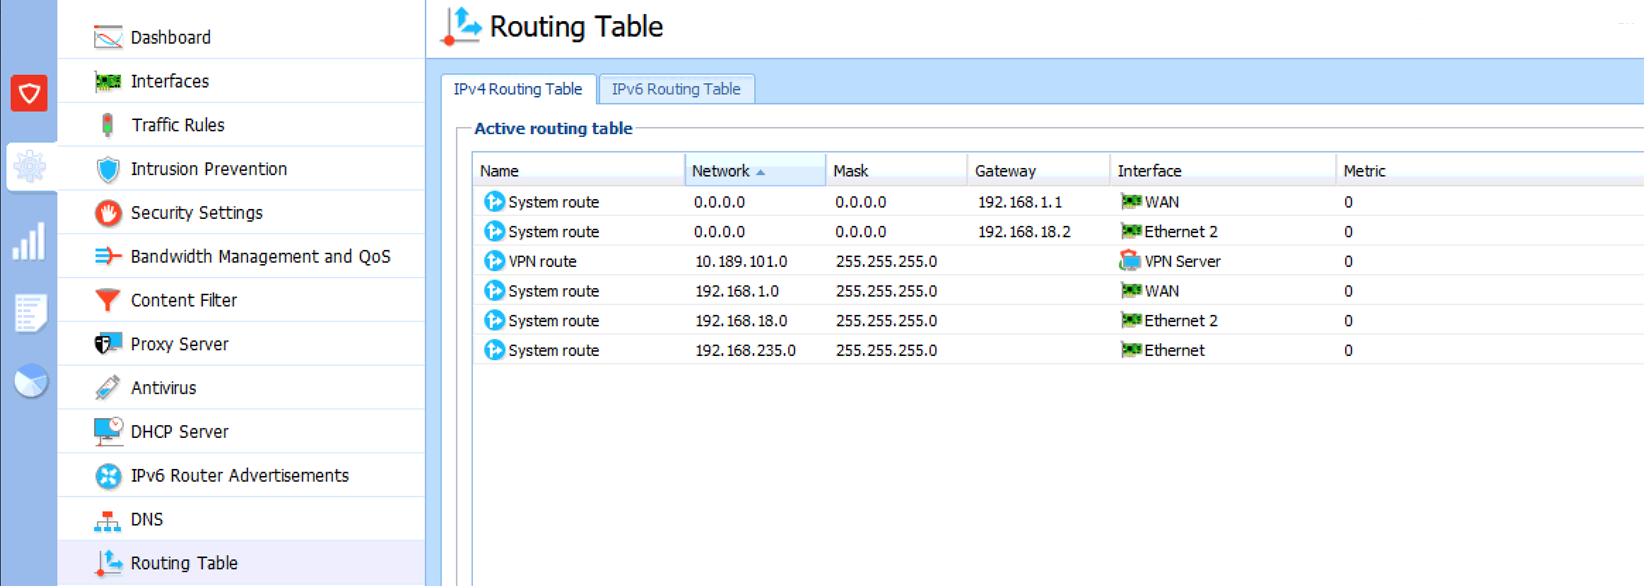
Static routing is a form of routing that occurs when a router uses a manually-configured routing entry, rather than information from dynamic routing traffic. Depending on the number of network interfaces, Kerio Control configures a predefined set of System routes, plus an additional VPN route.
From time to time, it might be required to configure Static routes to route specific traffic between internal and external networks.
This article provides detailed information on how to statically route the IPv4 and IPv6 traffic between two internal networks.
Example details
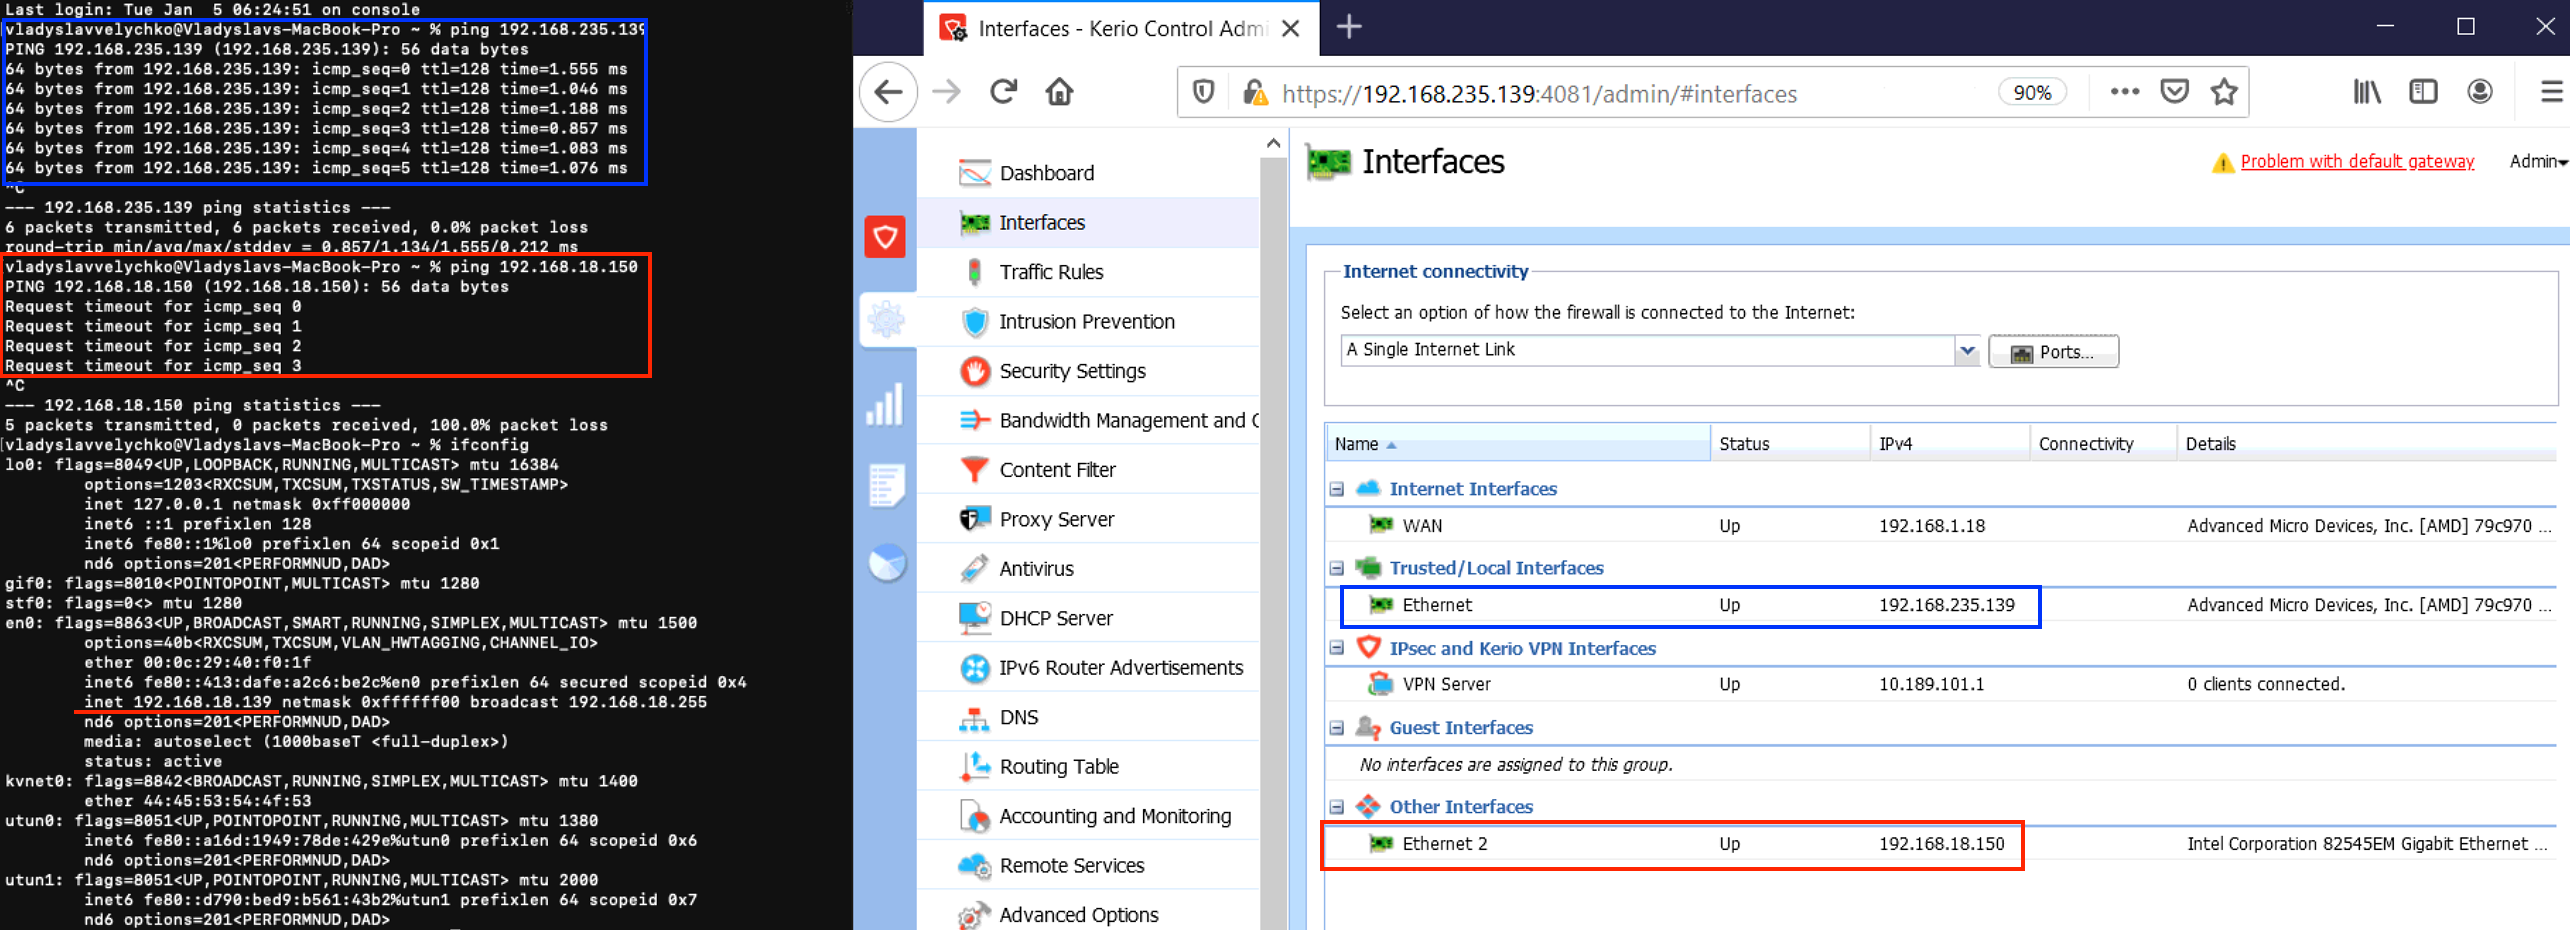
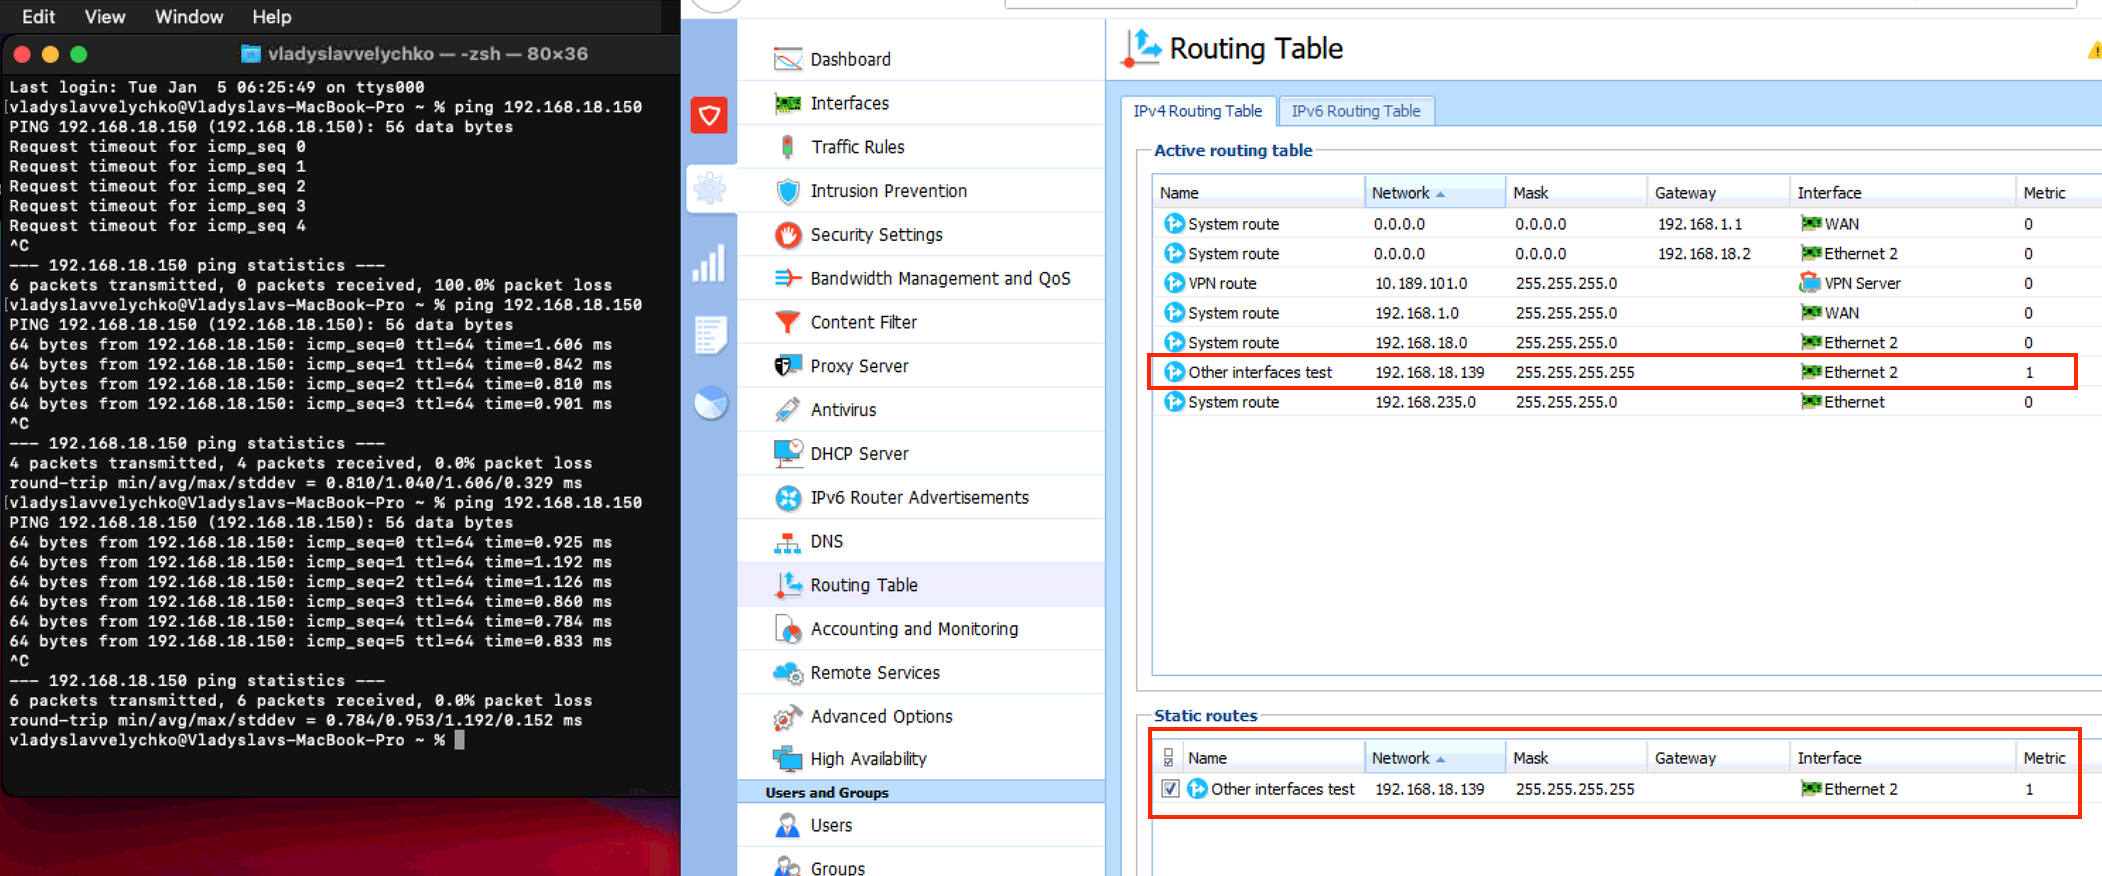
Client's IP address: 192.168.18.139
Trusted LAN: 192.168.235.139
Other Interfaces LAN: 192.168.18.150
Solution
IPv4
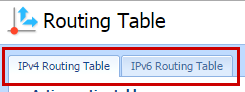
- On the Administration interface, navigate to Routing Table > IPv4 Routing Table.
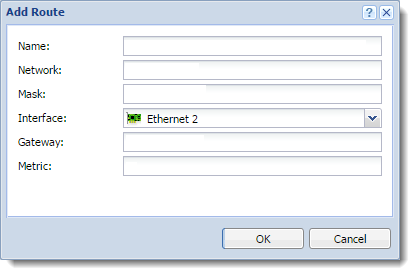
- Click on Add and type the route name in the Name field.
- Enter an IP subnet in the Network field.
- Enter a mask defining the subnet in the Mask field.
- Select the interface in the Interface menu.
- (Optional) Type the IP address of the gateway in the Gateway field.
- Type the number that defines the priority of the route in the Metric field.
- The route is being added and appears in the Active routing table.
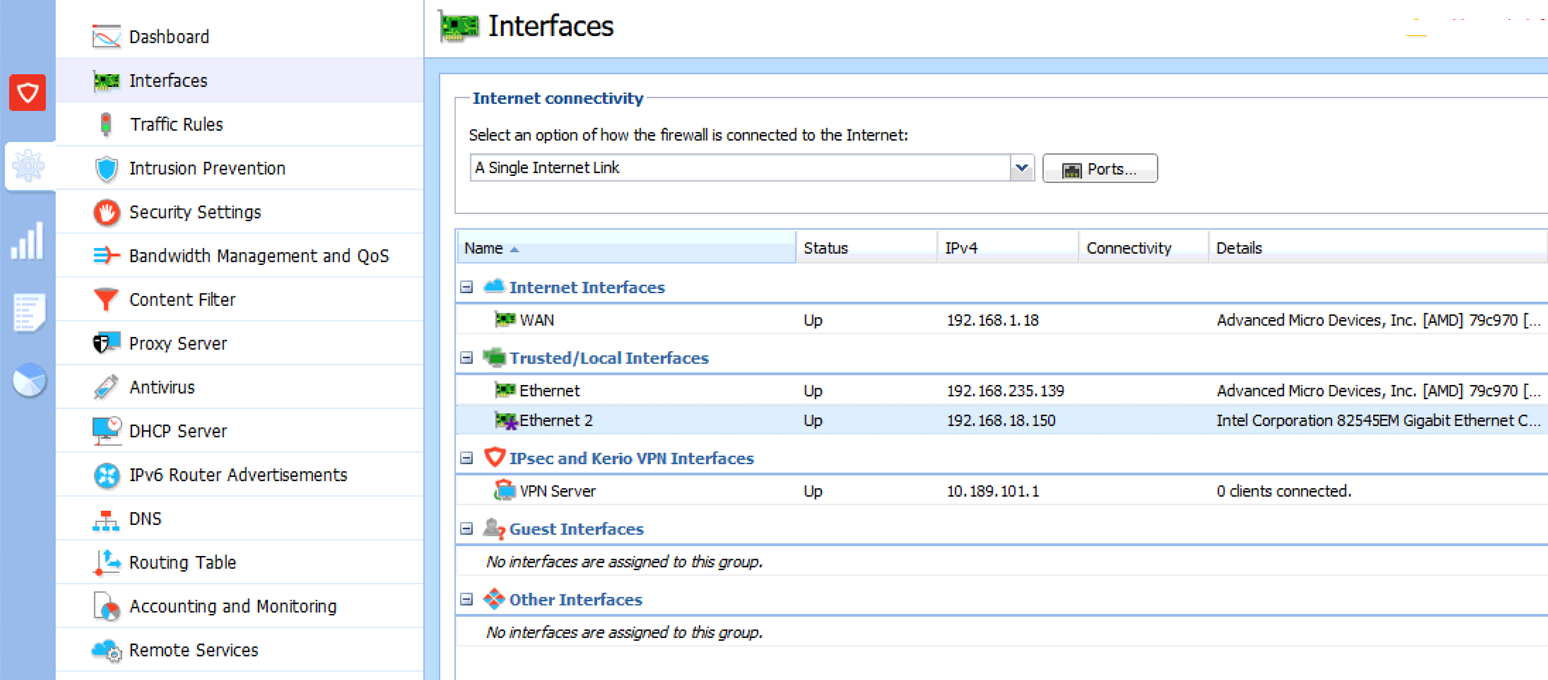
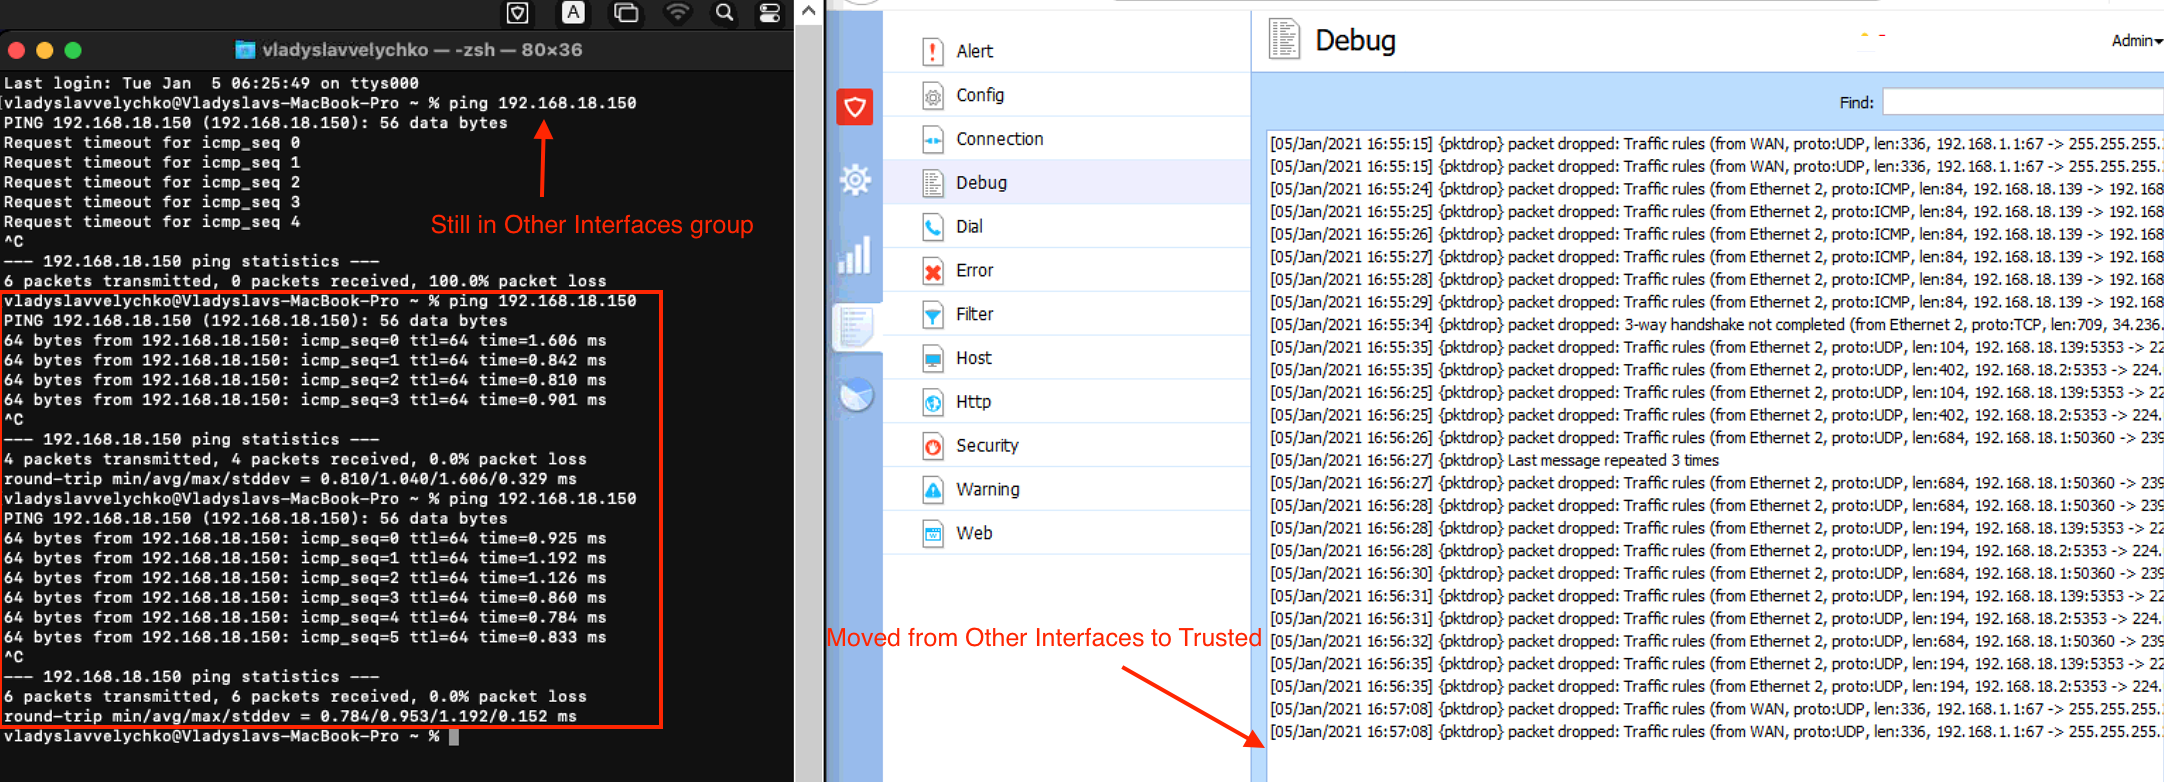
Important: make sure the routing is NOT being blocked by Traffic Rules. For this particular example, the Ethernet 2 interface was moved to the Trusted/Local interfaces group. In other scenarios, it might be necessary to configure relevant traffic rule policies.
IPv6
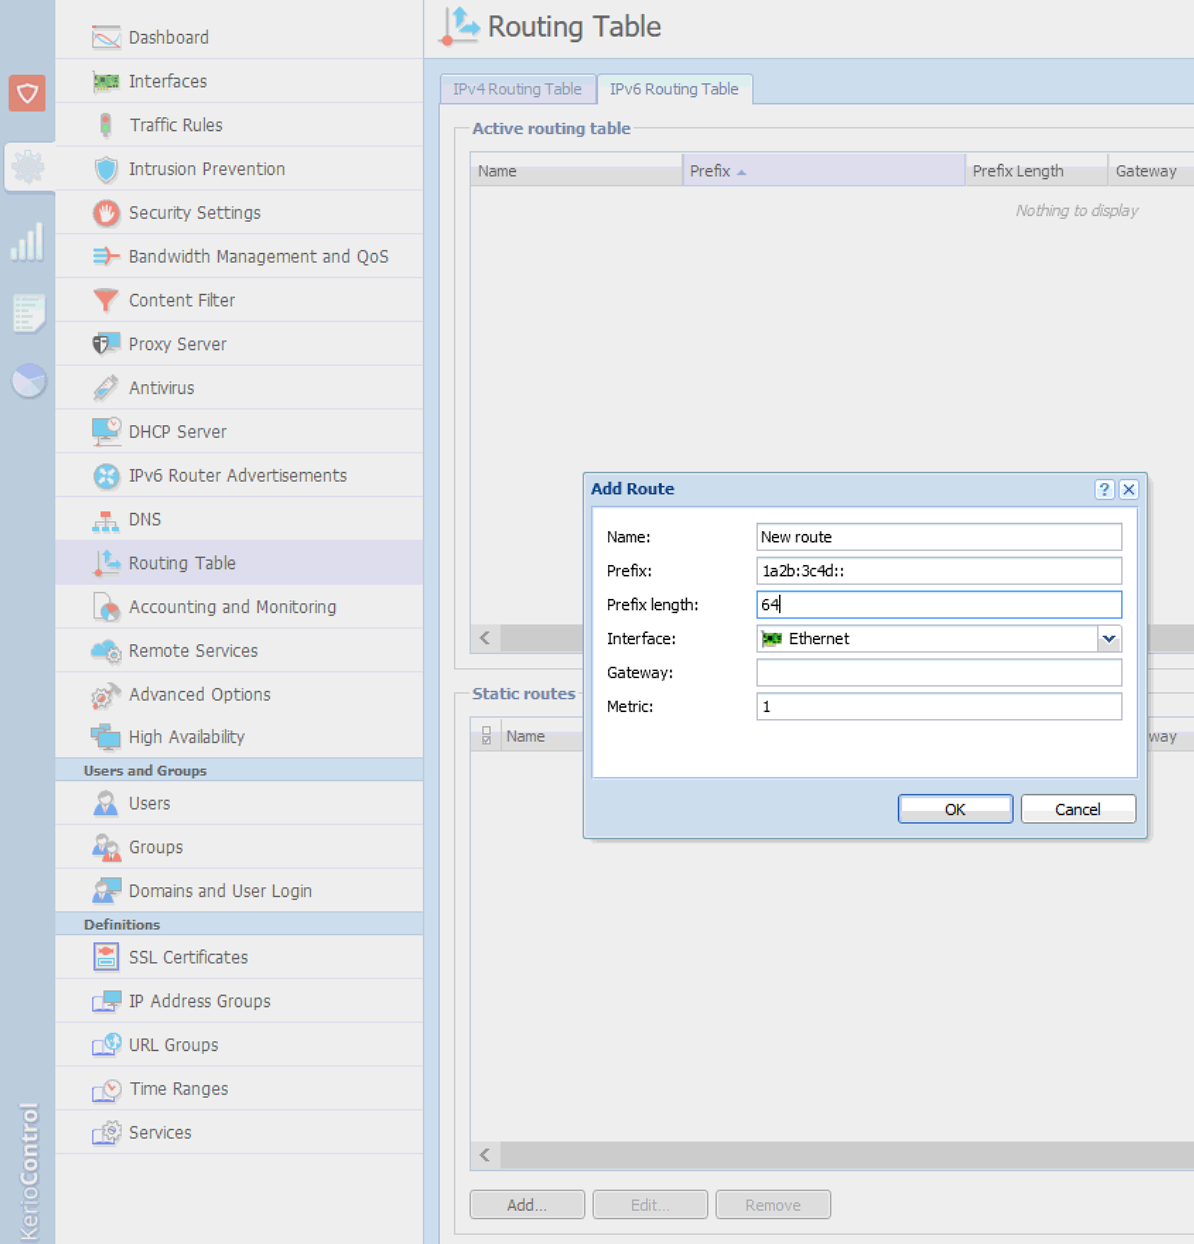
- On the Administration interface, navigate to Routing Table > IPv6 Routing Table tab.
- Click on Add and type the route name in the Name field.
- Enter an IP subnet in the Prefix field.
- Enter a prefix in the Prefix length field.
- Select the interface in the Interface menu.
- (Optional) Type the IP address of the gateway in the Gateway field.
- Type the number that defines the priority of the route in the Metric field.
Testing
The new values will now be visible in the main routing list. The traffic will be routed according to the configured values. Perform ping requests to validate the routing settings.
Priyanka Bhotika
Comments