Overview
Ethernet Ports configuration in Kerio Control's hardware devices is doable as Standalone or in a LAN bridge.
Standalone interface maintains its own network with a separate IP subnet and optional DHCP scope. You can apply bandwidth and traffic rules' policies to Standalone interfaces.
LAN Switch is a virtual network interface that shares its TCP/IP configuration with all associated ports. All Kerio Control policies apply to all Ethernet ports in the LAN Switch. All local network ports belong to the LAN switch by default and a port can be manually excluded as Standalone.
Solution
Configuring Ports
Warning: Do not try to administer the appliance through the port you want to switch to Standalone mode. If you do, Kerio Control will not apply the configuration.
To change from LAN Switch to Standalone:
- In the administration interface, go to Interfaces or Interfaces and WiFi.
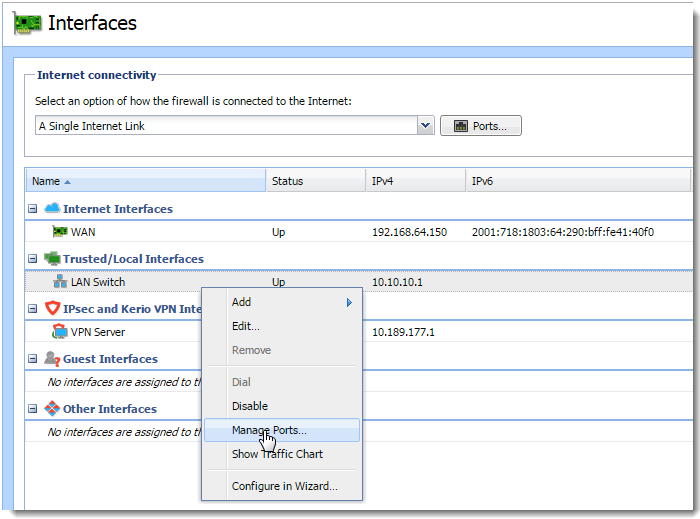
- Right-click the LAN Switch interface.
- In the context menu, choose Manage Ports.
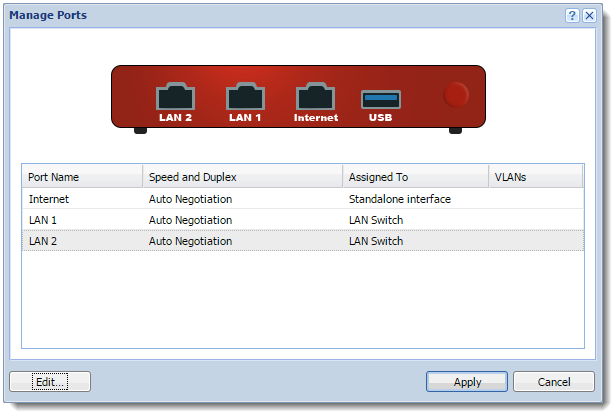
- In the Manage Ports dialog box, select a port and click Edit. The Manage Ports dialog box shows the scheme of the hardware device with a port description helping identify which port to configure.
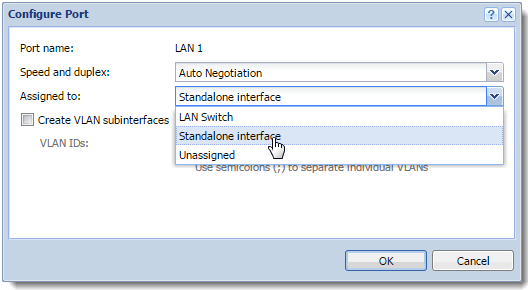
- In the Configure Port dialog box, choose Standalone interface.
NOTE: You can add virtual LAN sub-interfaces for standalone interfaces. For additional information, refer to Configuring VLANs.
- Click OK.
- Click Apply. Kerio Control verifies your configuration changes. However, if you are physically connected through the port you want to change, Kerio Control does not apply the changes and the port stays assigned to the LAN switch.
Configuring the New Interface
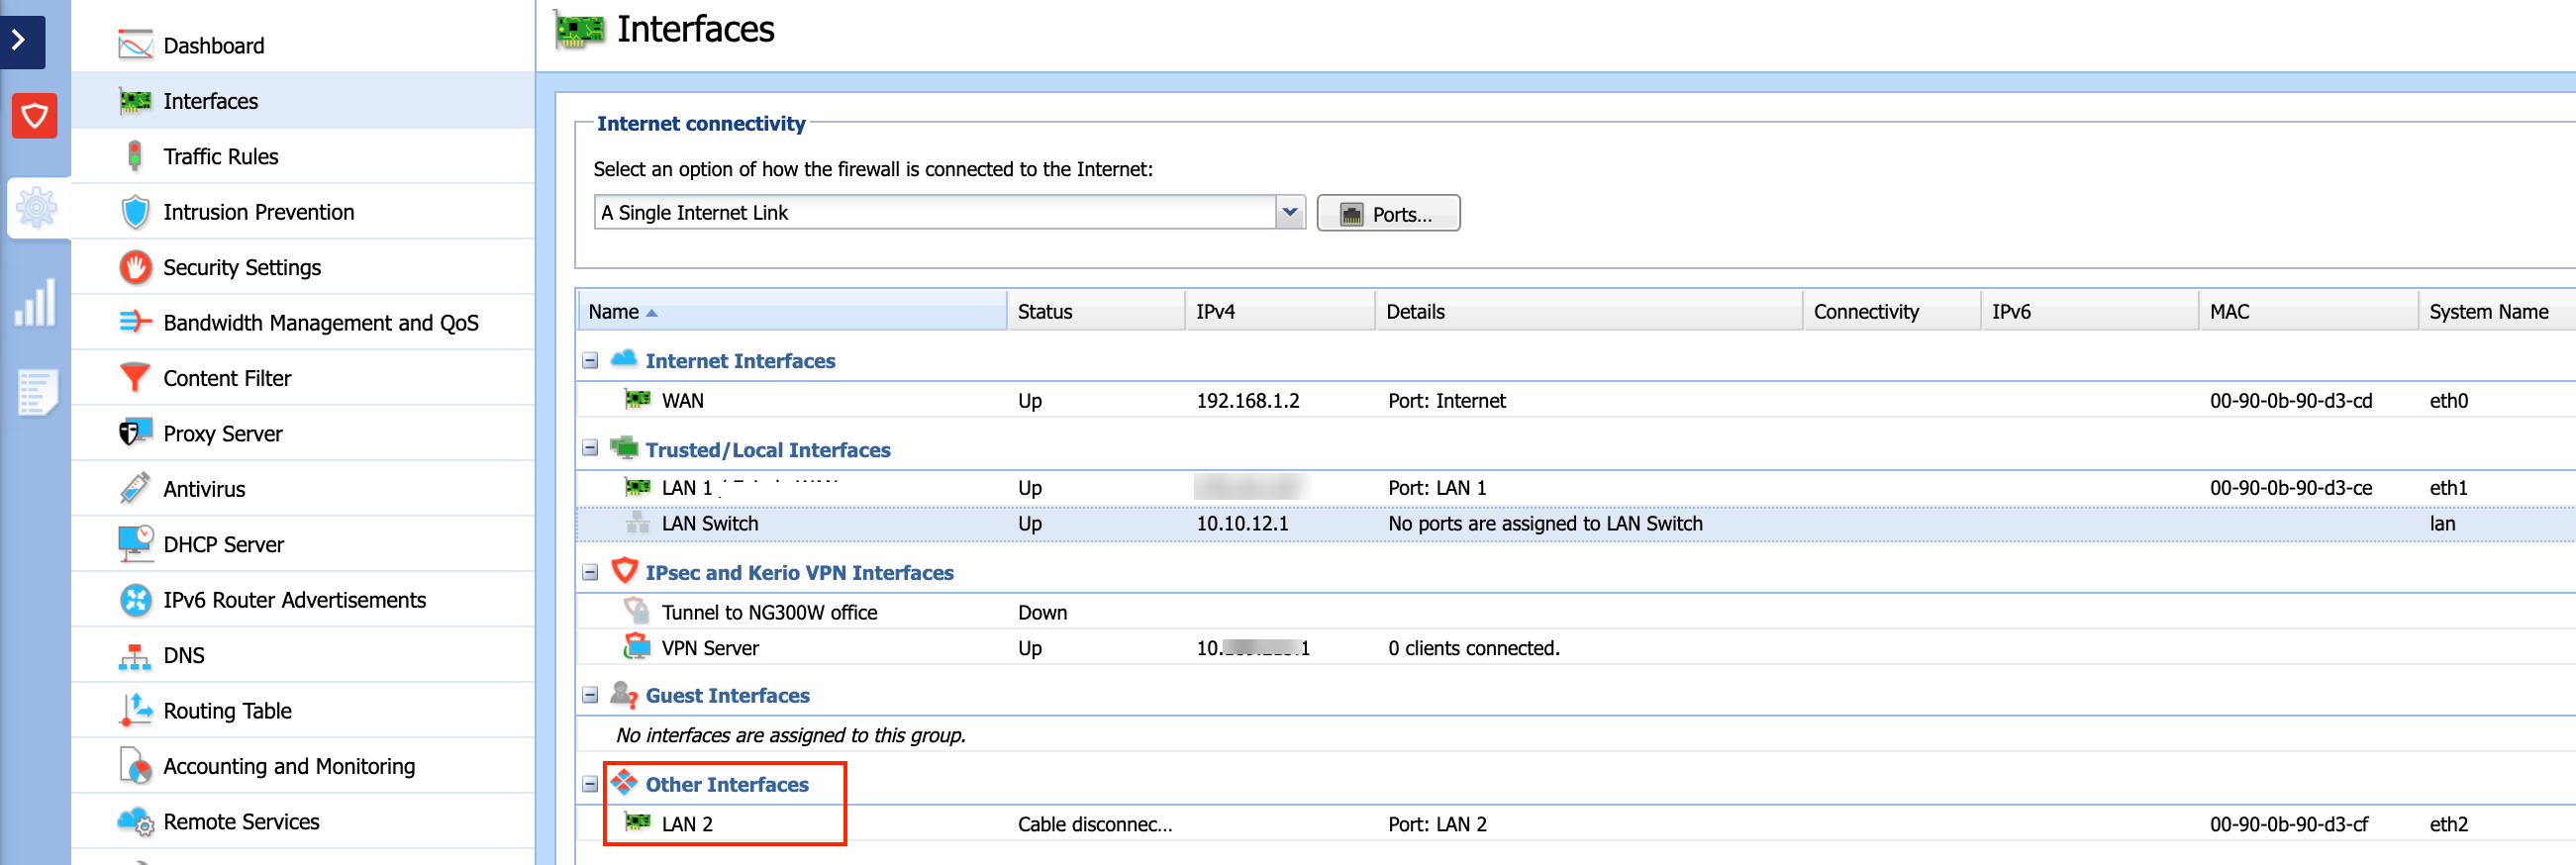
- In the administration interface, go to Interfaces or Interfaces and WiFi.
- Move the Standalone interface to another interface group. By default, Kerio Control assigns the newly created Standalone interface to the Other interfaces group.
For additional information, refer to Configuring Network Interfaces. - Configure the TCP/IP settings. For more information about this process, refer to Configuring IPv4 Settings.
- (Optional) Enable the DHCP scope.
Priyanka Bhotika
Comments