Overview
VPN connection for macOS users can be established using Kerio Control IPSec VPN server. VPN authentication can be configured by importing an SSL certificate or by using a Preshared Key (PSK).
This article provides details on how to connect to your company network through IPsec VPN and authenticate with an SSL certificate or Preshared Key.
Solution
Configuring Kerio Control
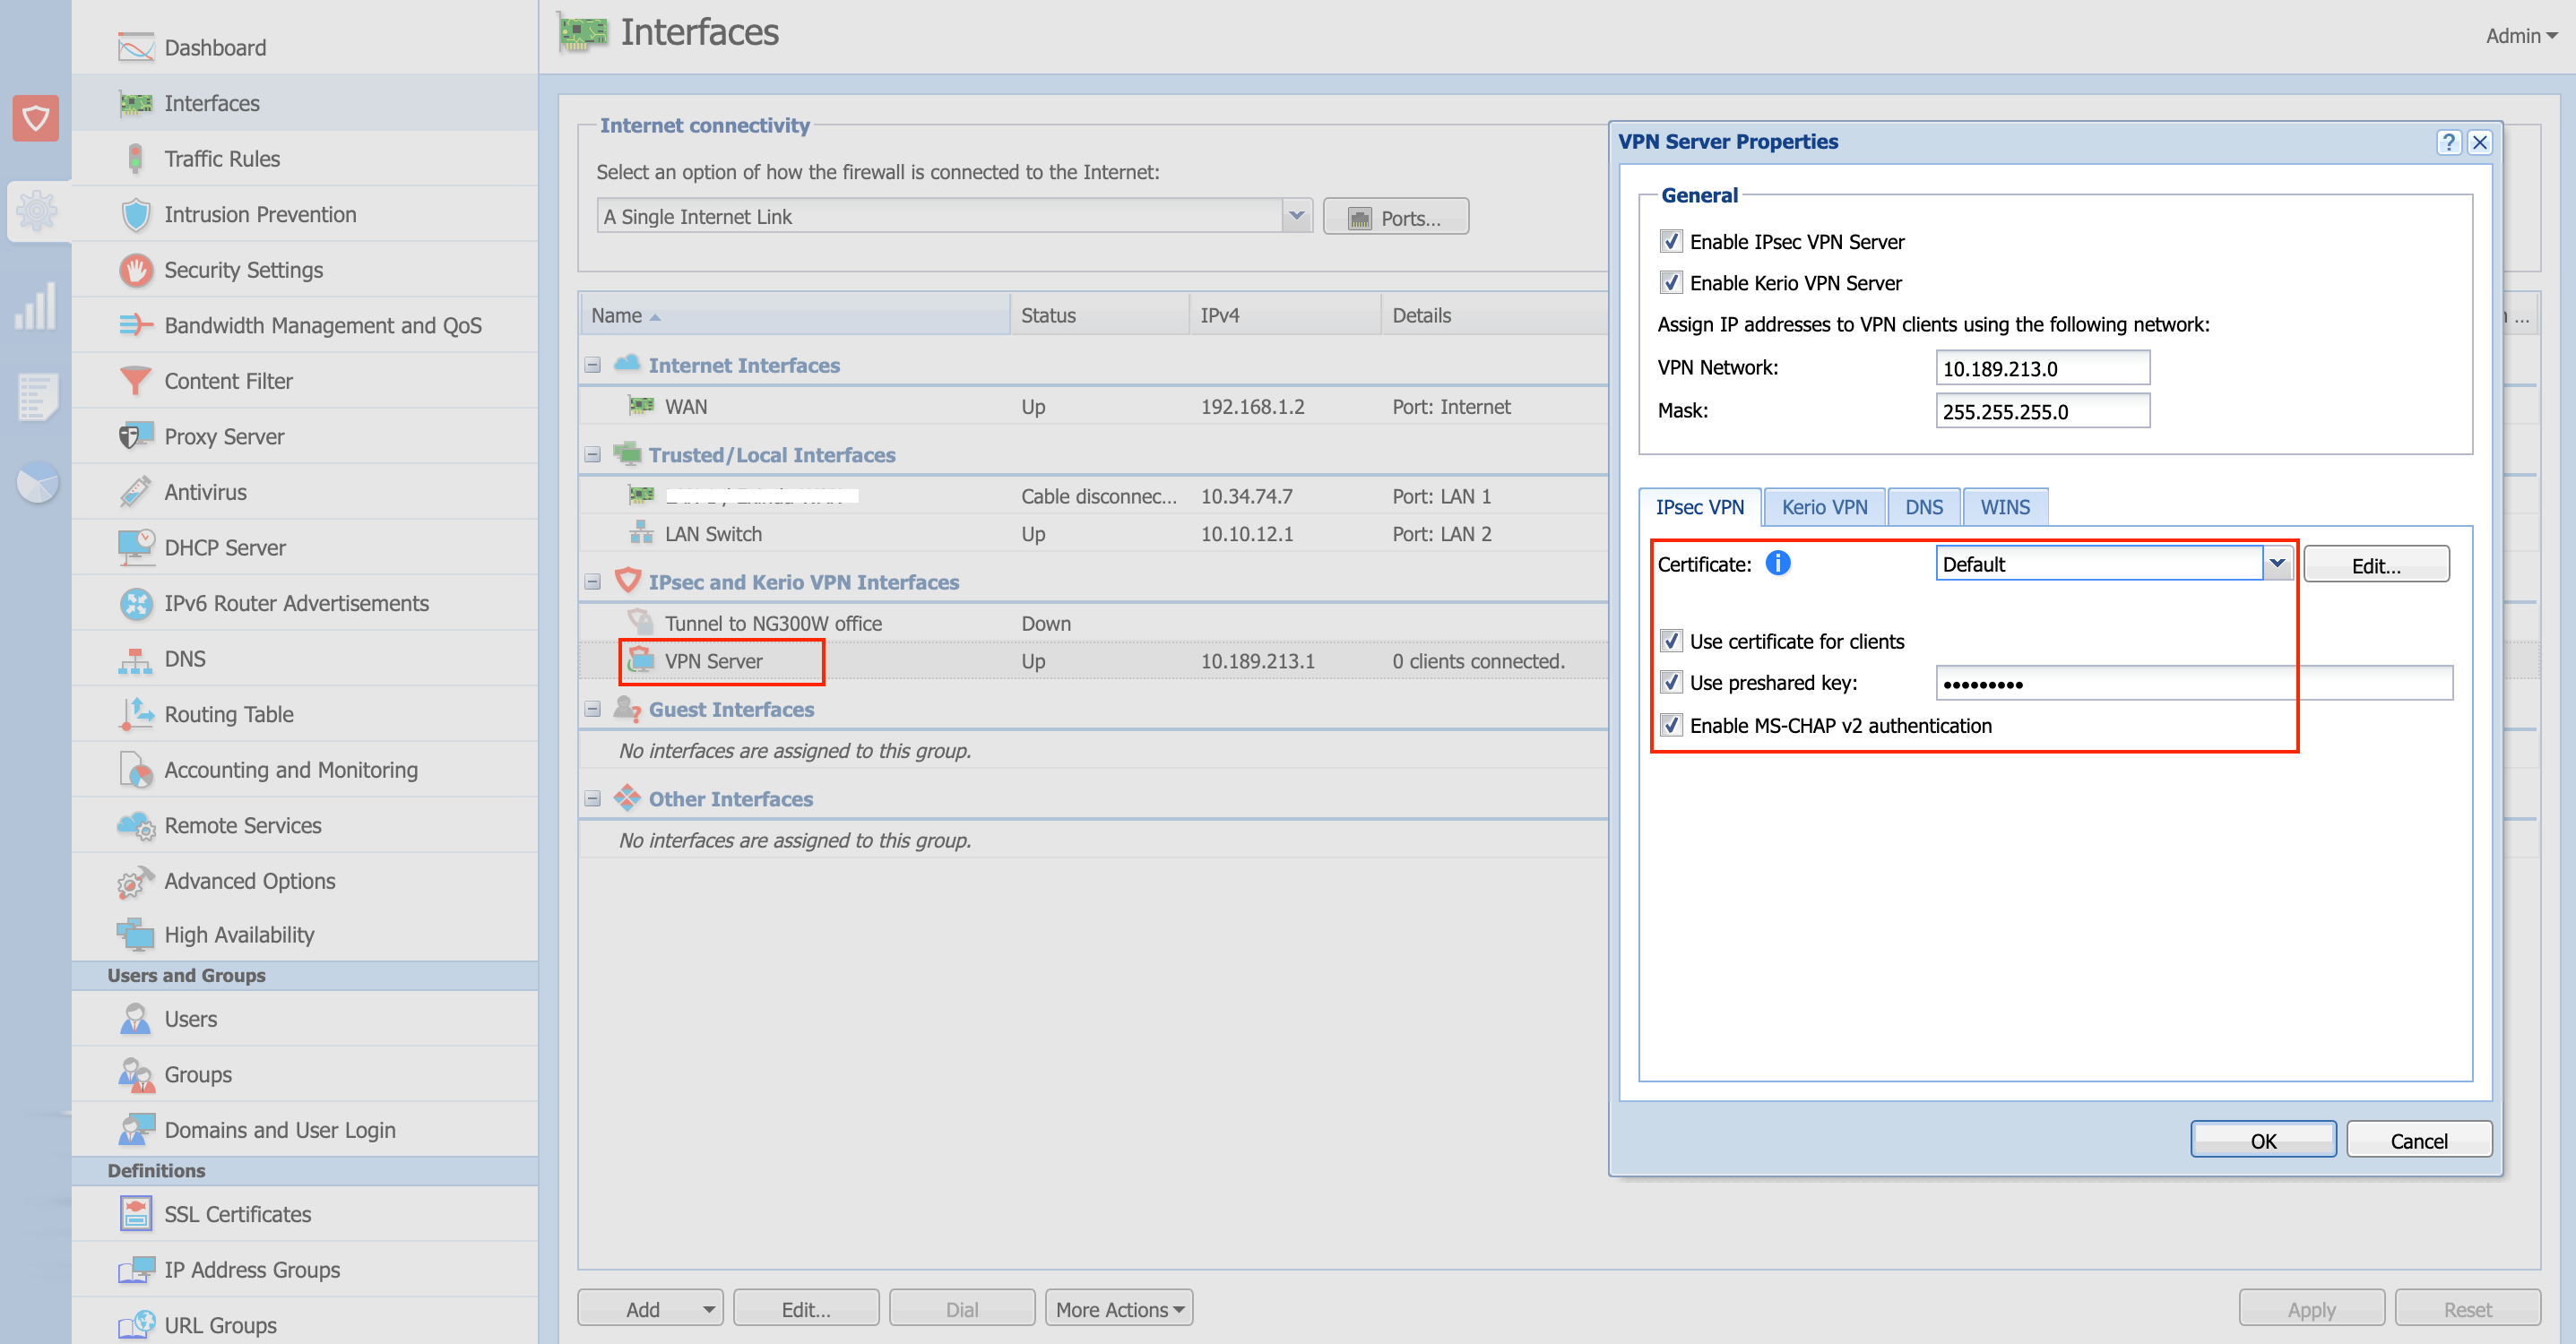
- Make sure to enable the IPSec VPN server in Kerio Control Webadmin > Interfaces > double-click VPN server.
- For SSL certificate authentication: Enable Use certificate for clients, choose valid SSL certificate from the dropdown.
- For PSK authentication: specify the PSK in Use preshared key. This password needs to be shared with Kerio Control users.
Note: enabling MS-CHAP v2 authentication is also recommended.
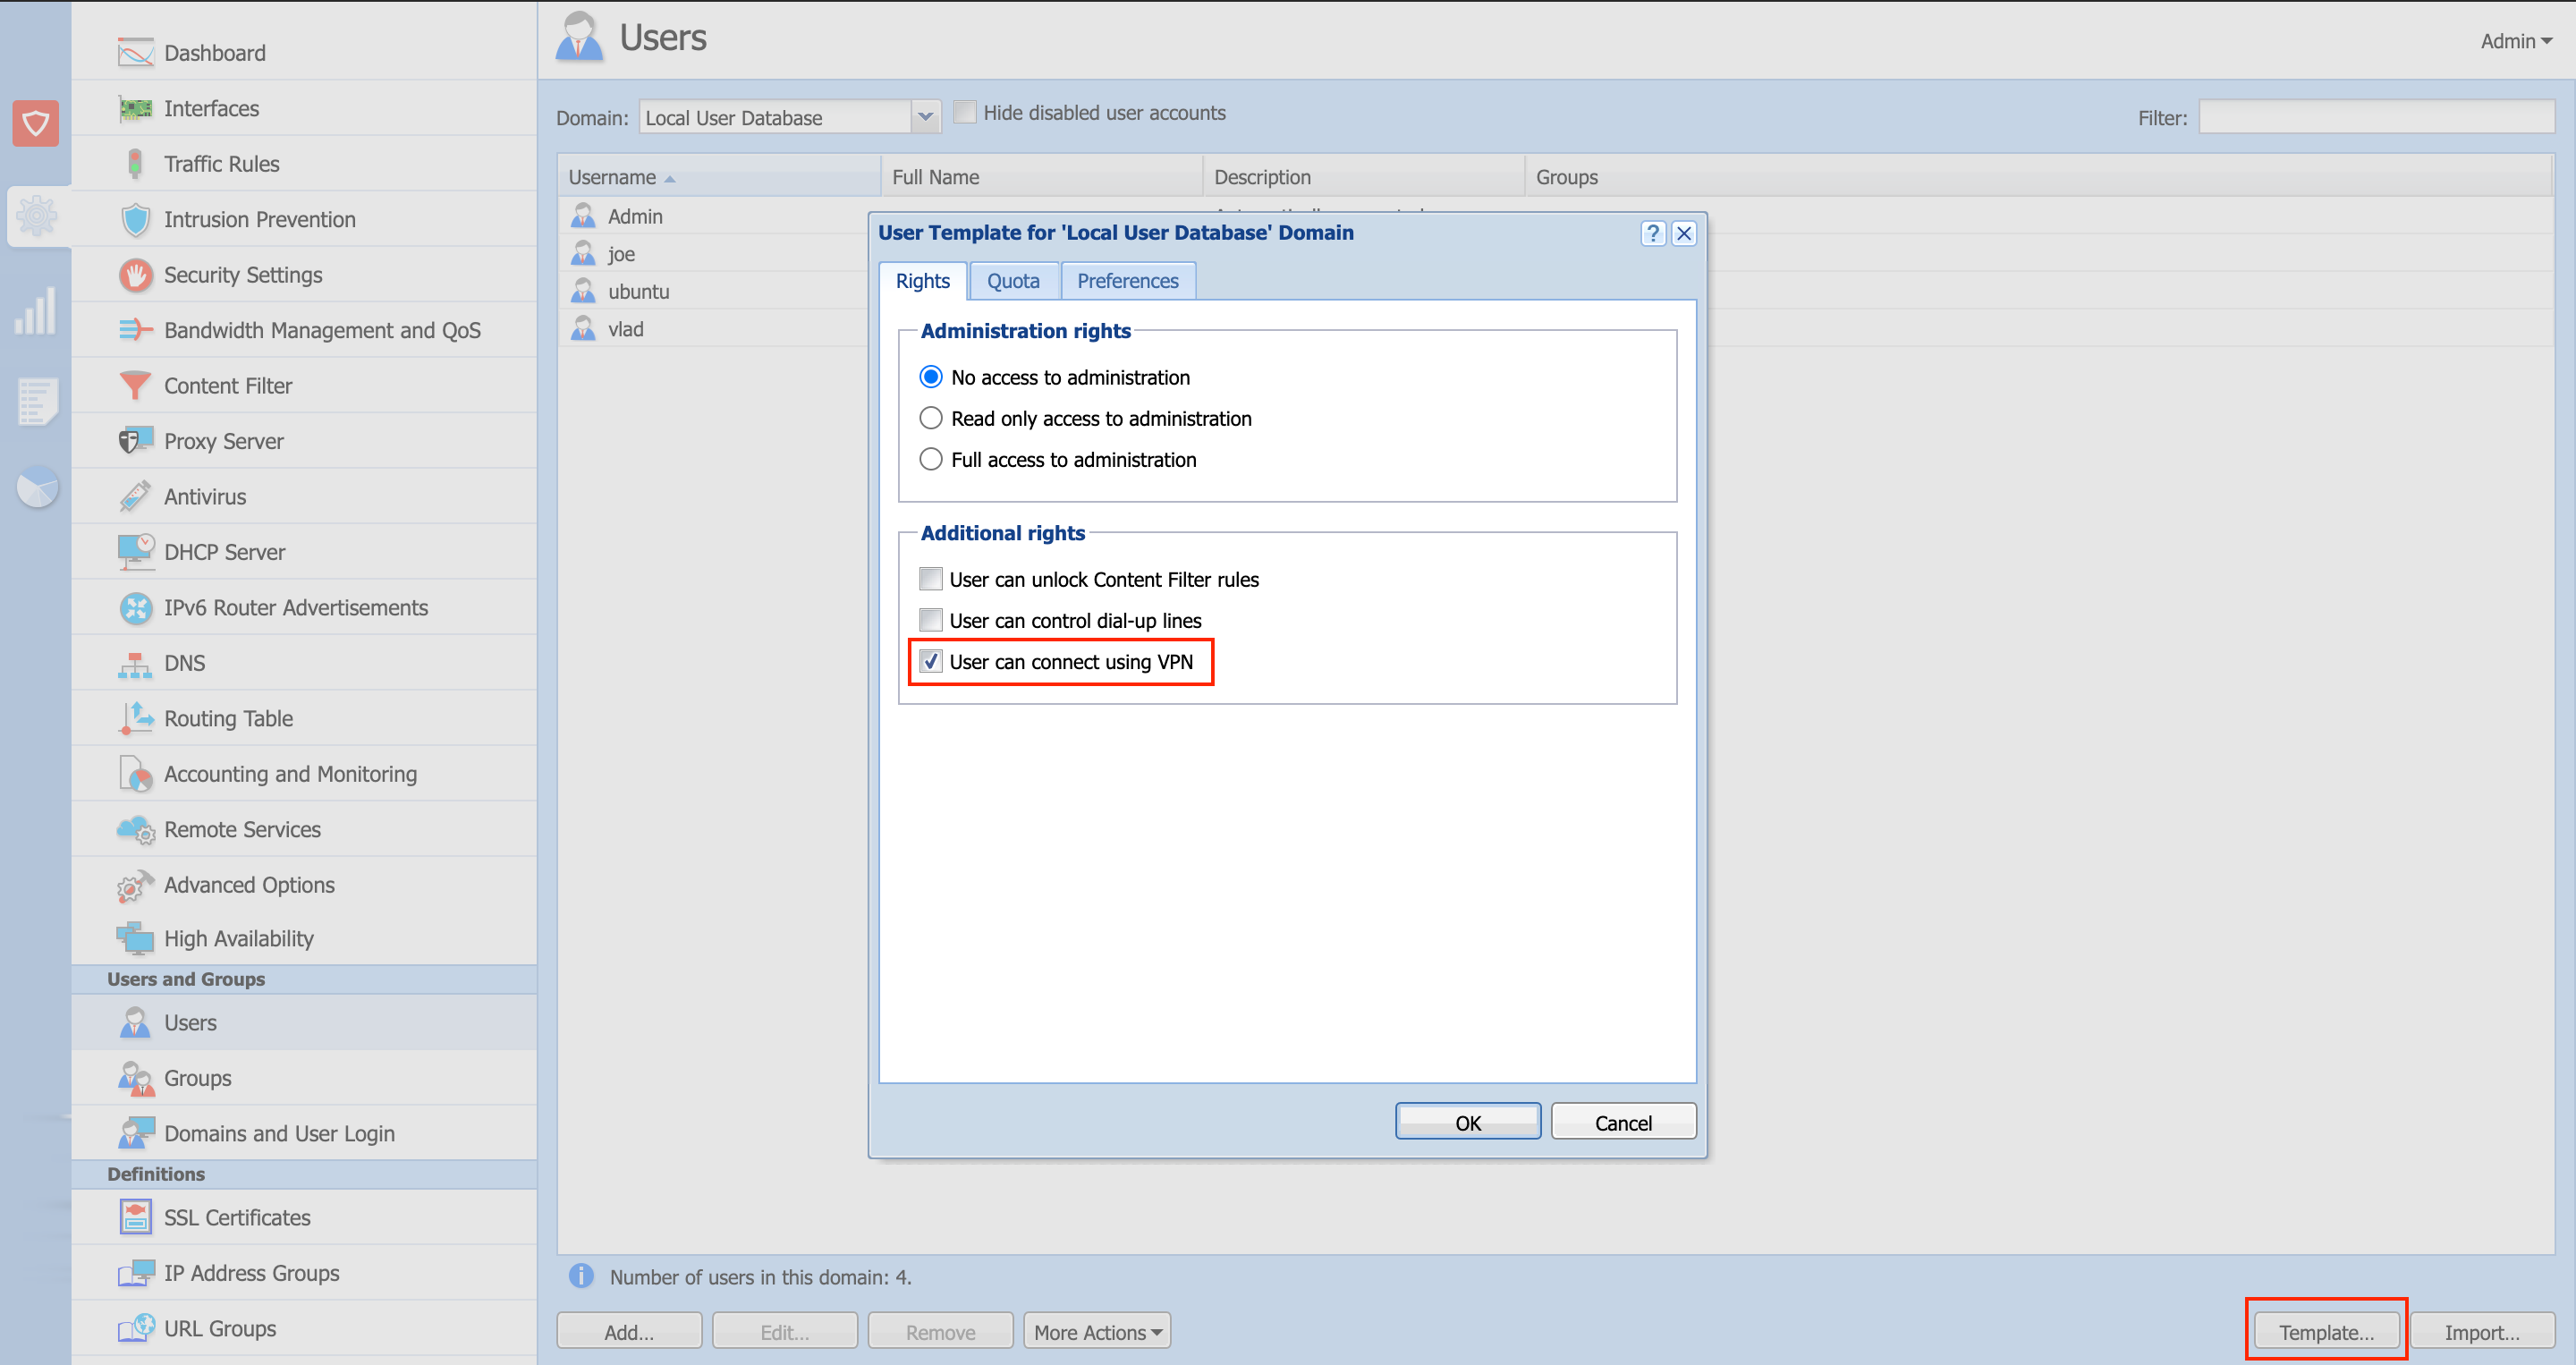
- Make sure to enable "User can connect using VPN" in
Configuration > Users > Template.
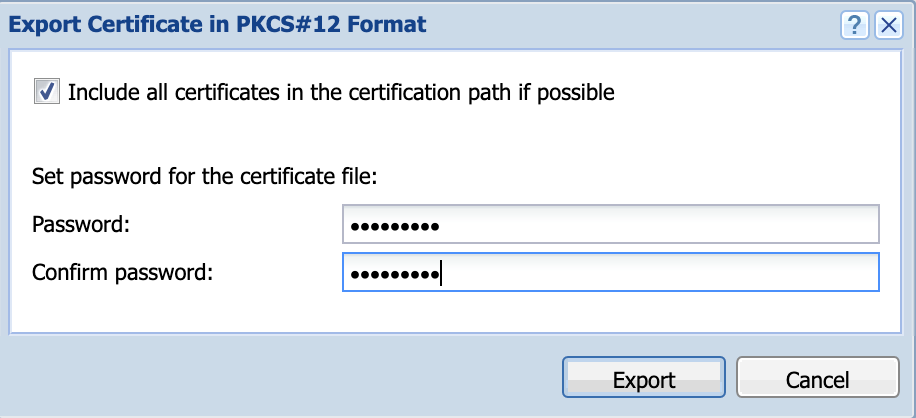
- For SSL certificate authentication, export the certificate in the PKCS#12 format from
Configuration > SSL Certificates > right-click on certificate and Export.
In the Export Certificate in PKCS#12 Format dialog, use a password without national characters.
Check Include all certificates in the certification path if possible. The certificate should be distributed across Kerio Control Mac users.

Configuring built-in VPN on Mac
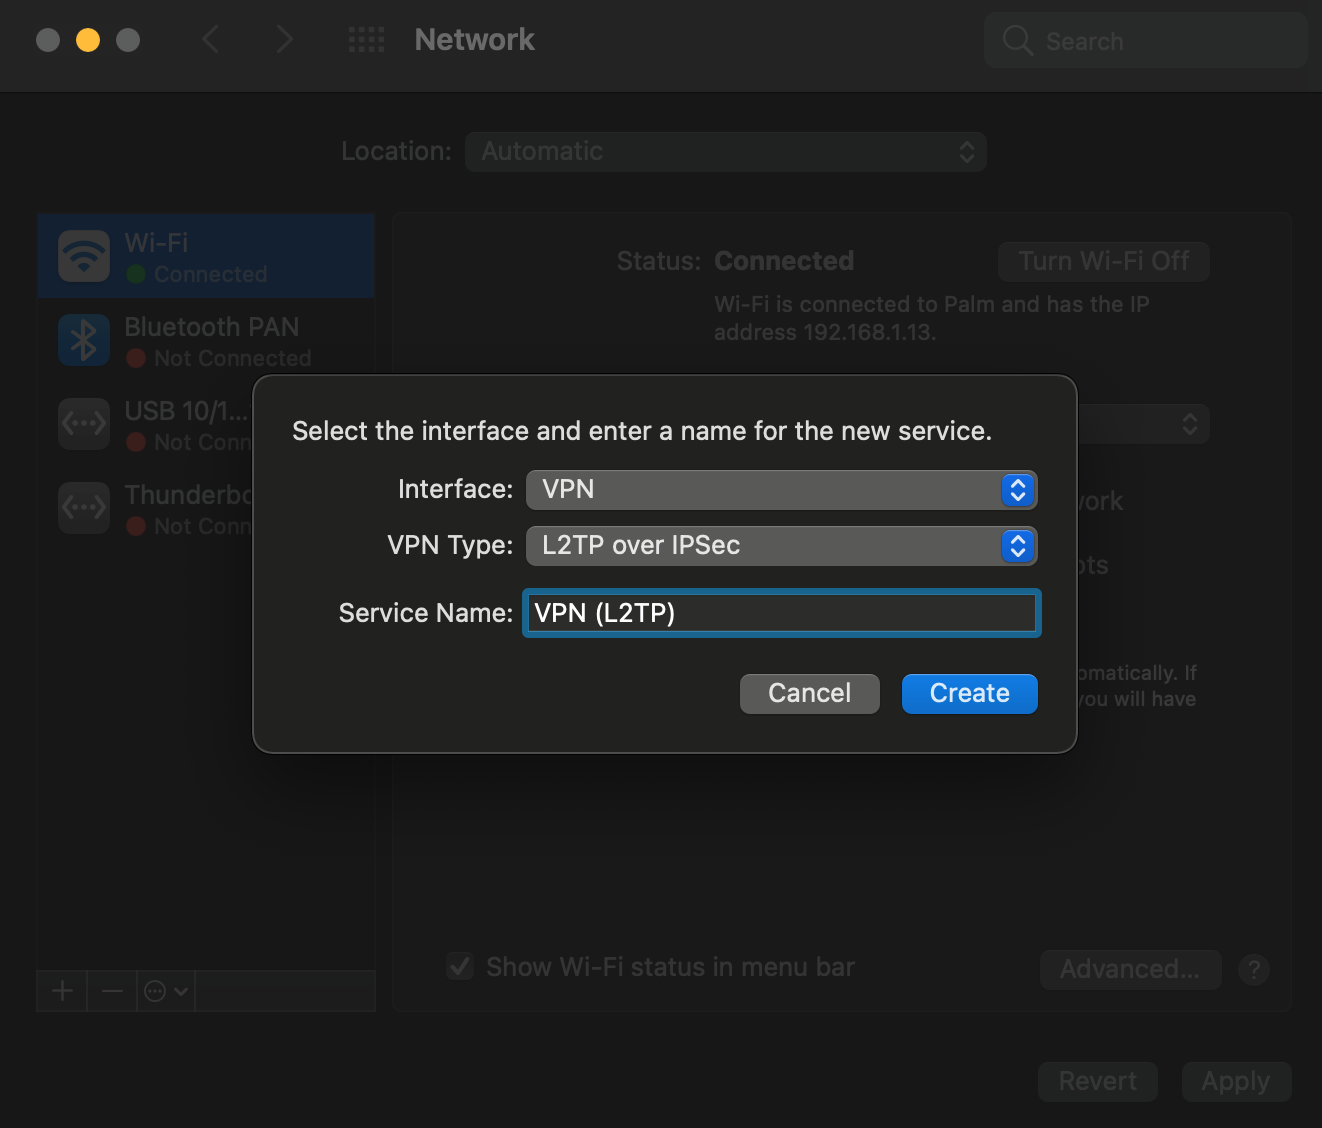
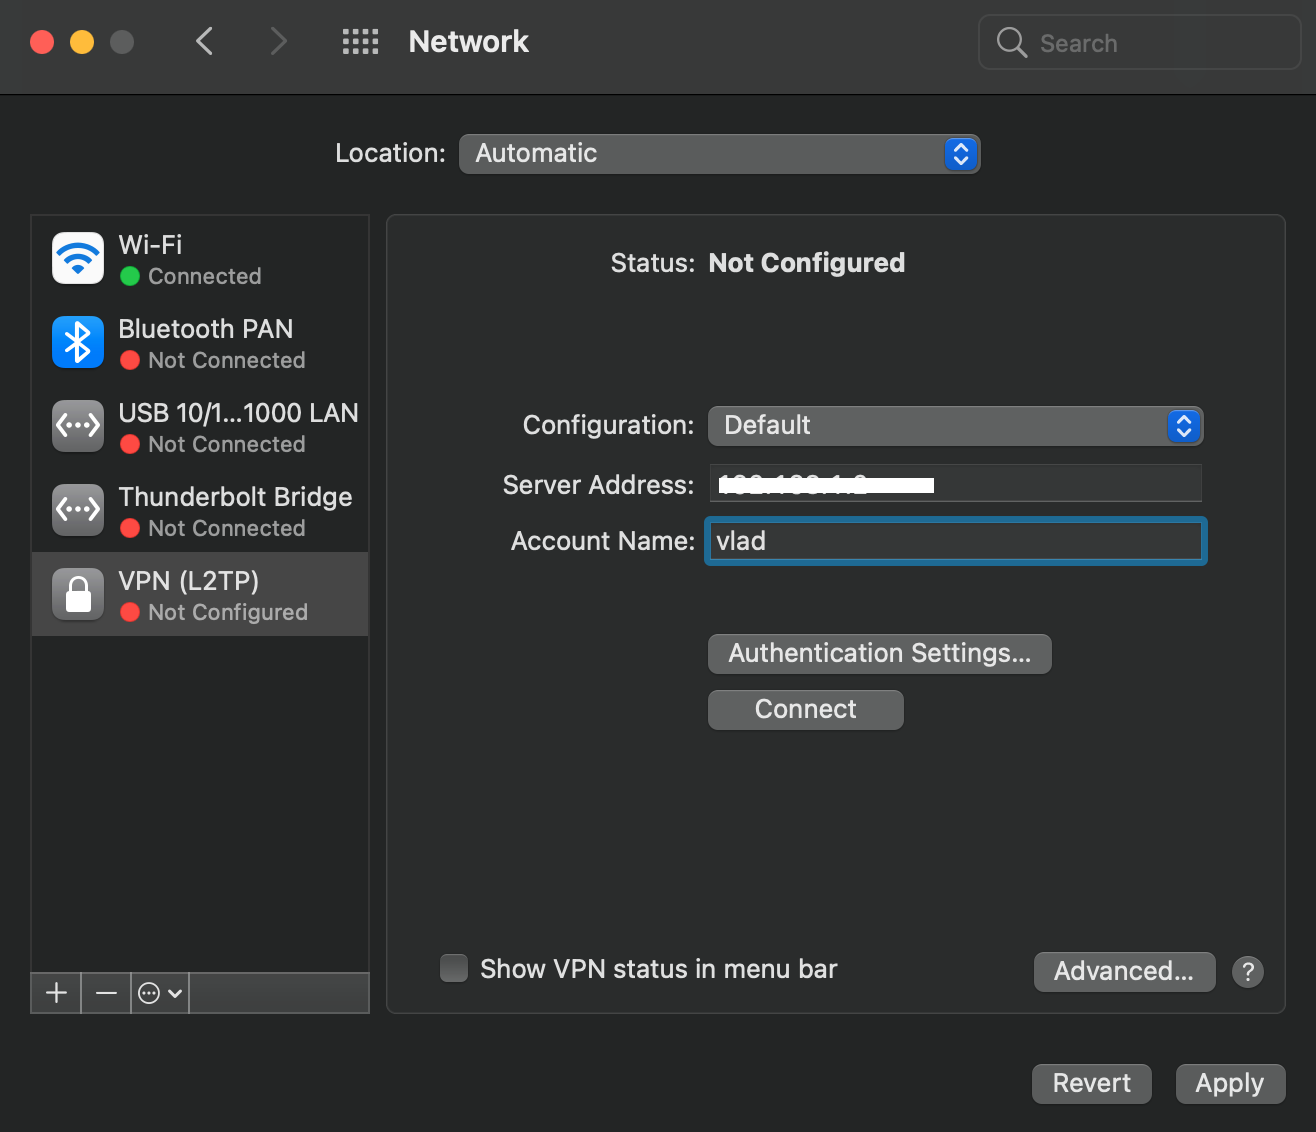
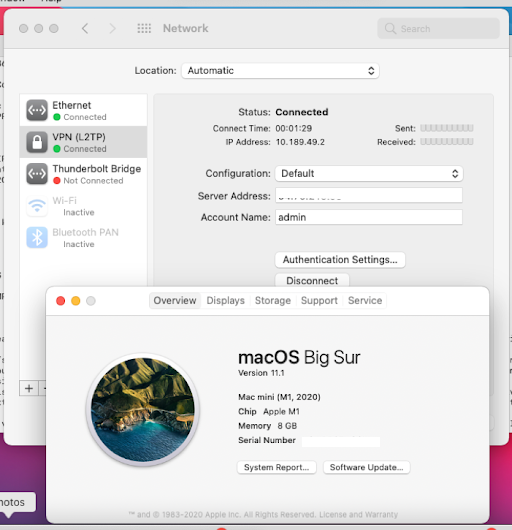
- Go to System Preferences > Network.
- In the Network dialog, click the + icon and add VPN.
- Select the VPN interface and L2TP over IPsec type. Click Create.
- Specify Kerio Control server address (IP or FQDN) together with the Account Name (Kerio Control username).
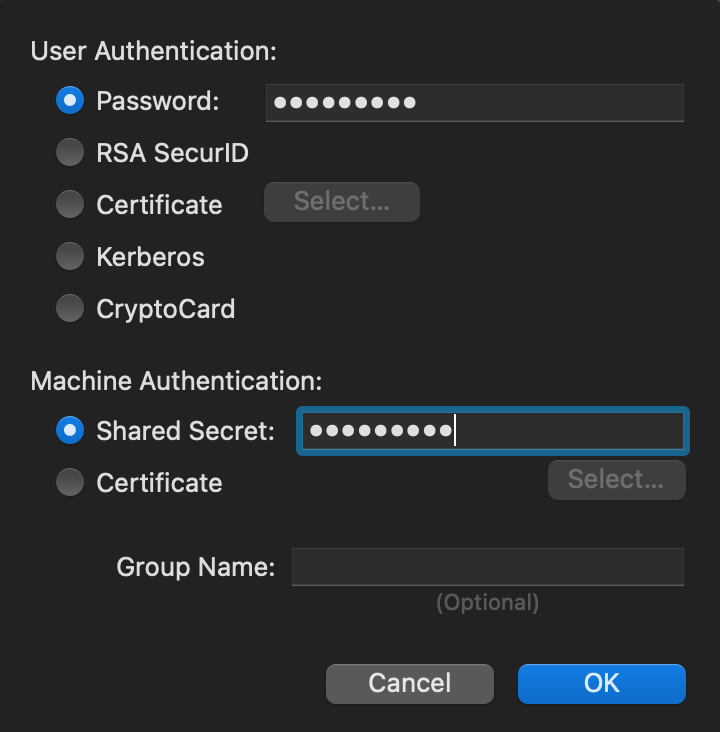
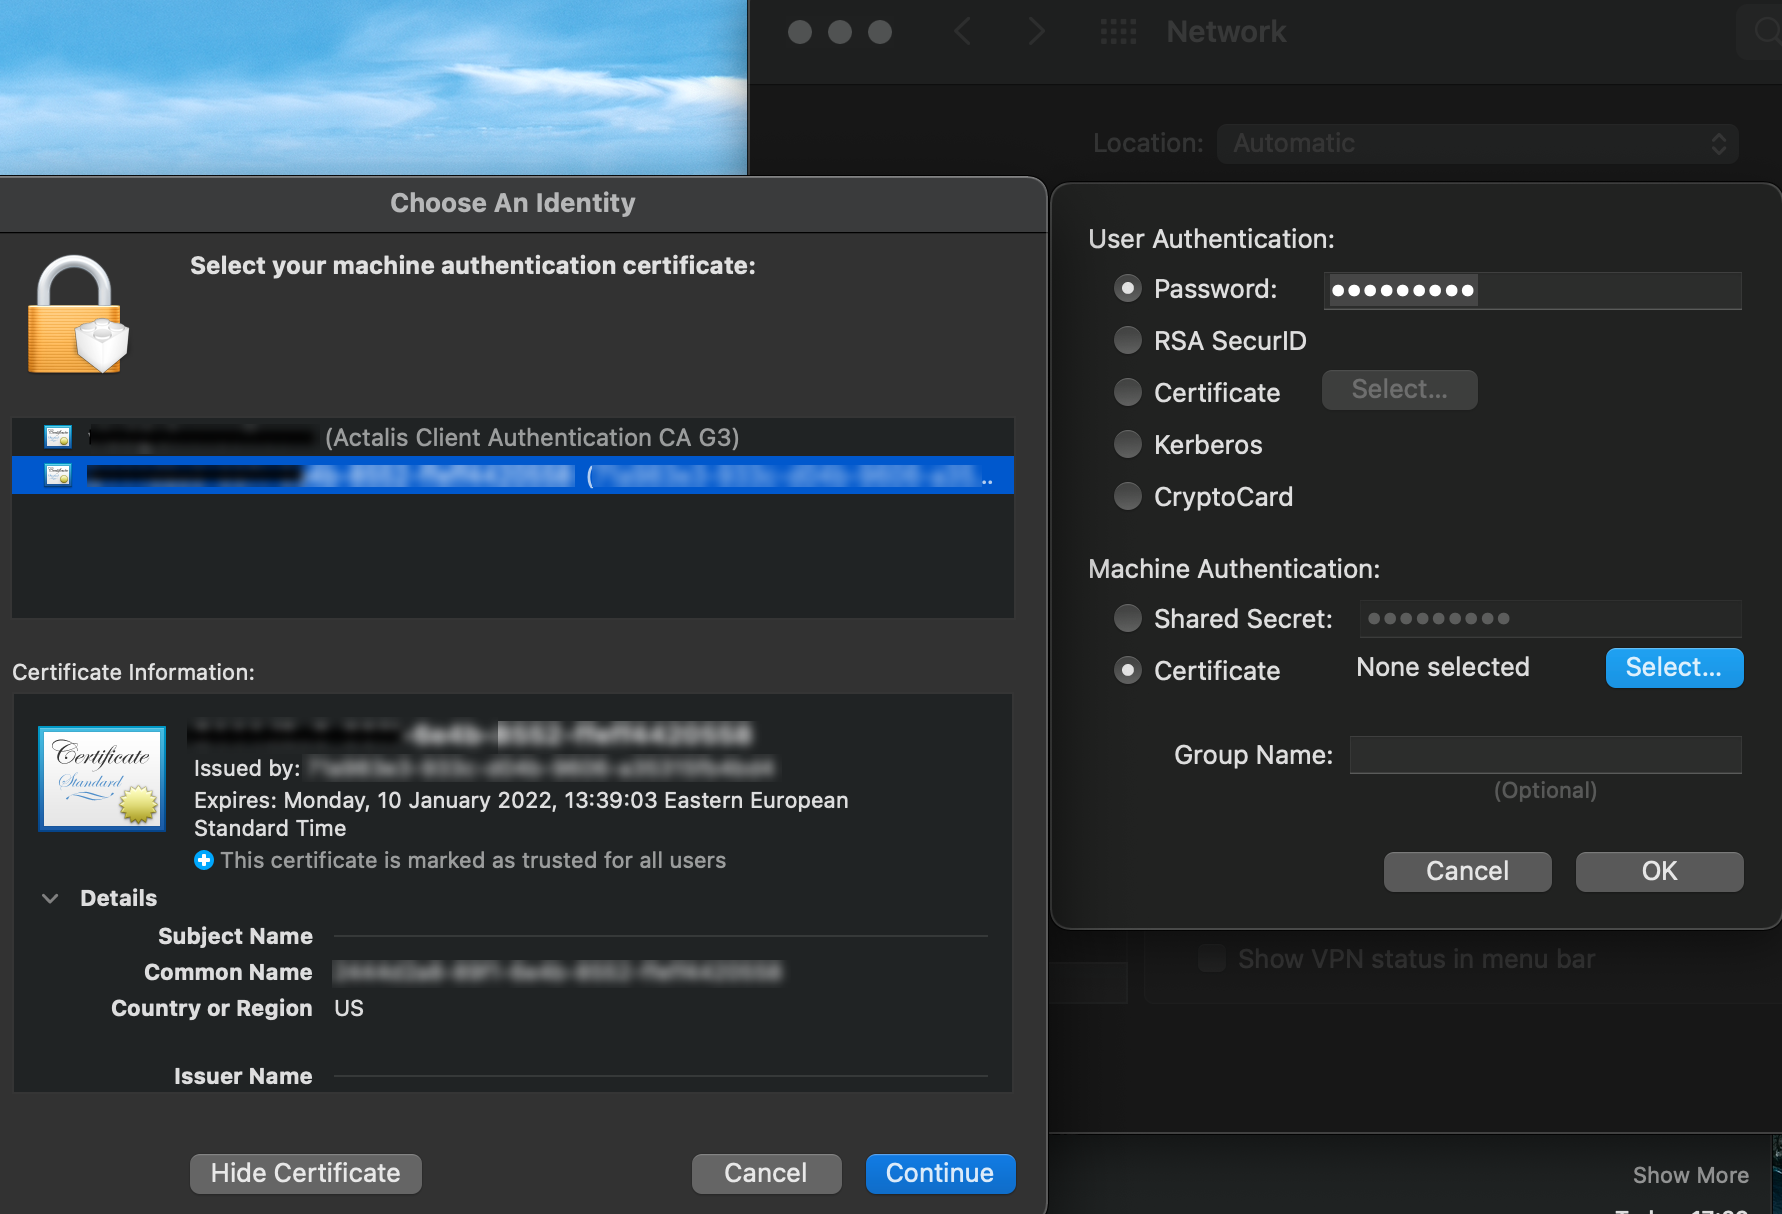
- Click Authentication Settings and specify Kerio Control user's password and PSK (Shared Secret) or select the imported certificate. Click OK to close the window.
PSK Auth
SSL certificate auth
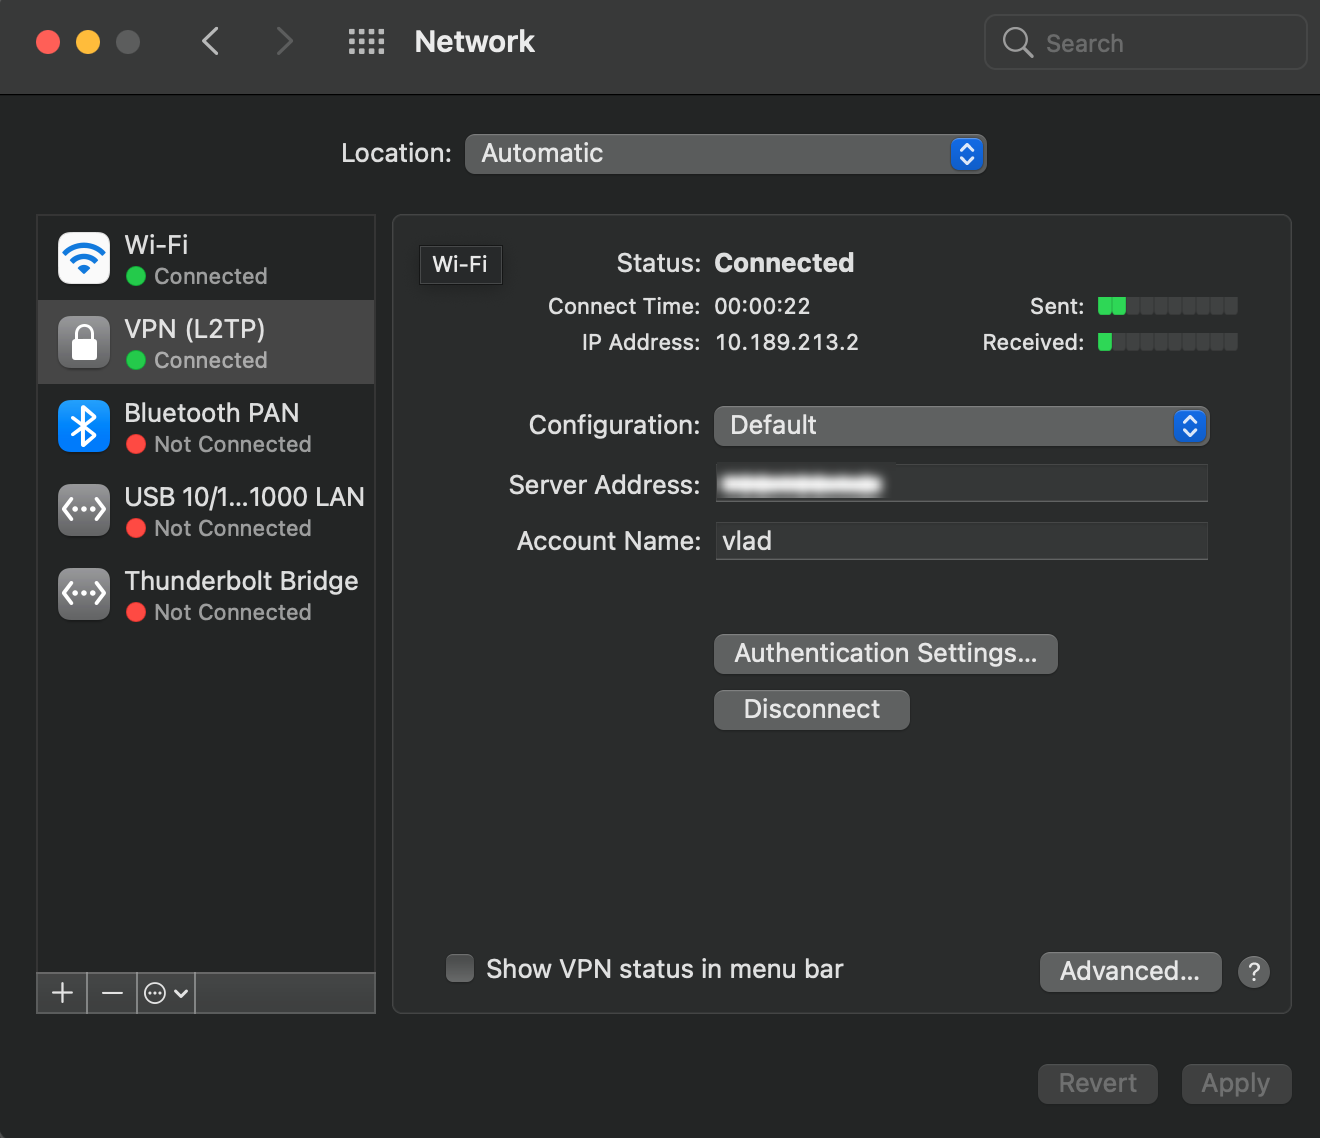
- Click Apply.
- Click Connect. The VPN is now connected.
Important: this is a valid workaround for the latest M1-based Macbooks.
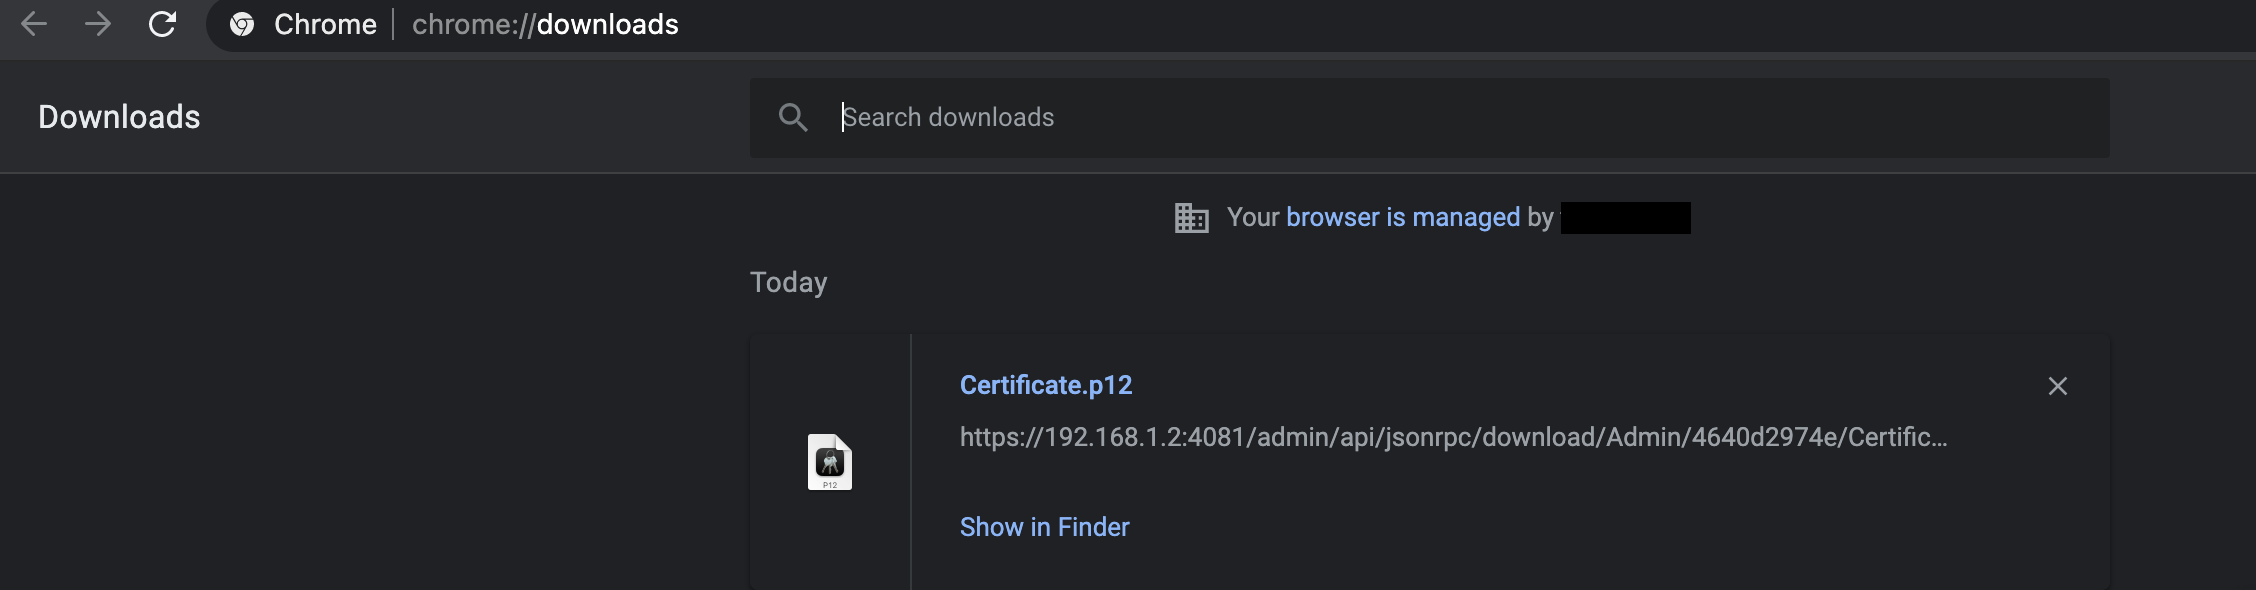
Importing the certificate
- Double-click the distributed Certificate.p12.
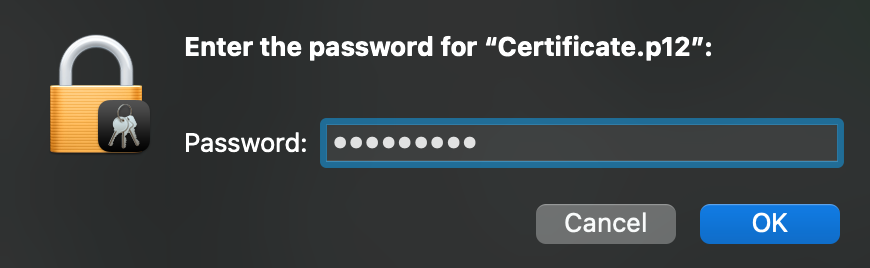
- Enter the certificate password.
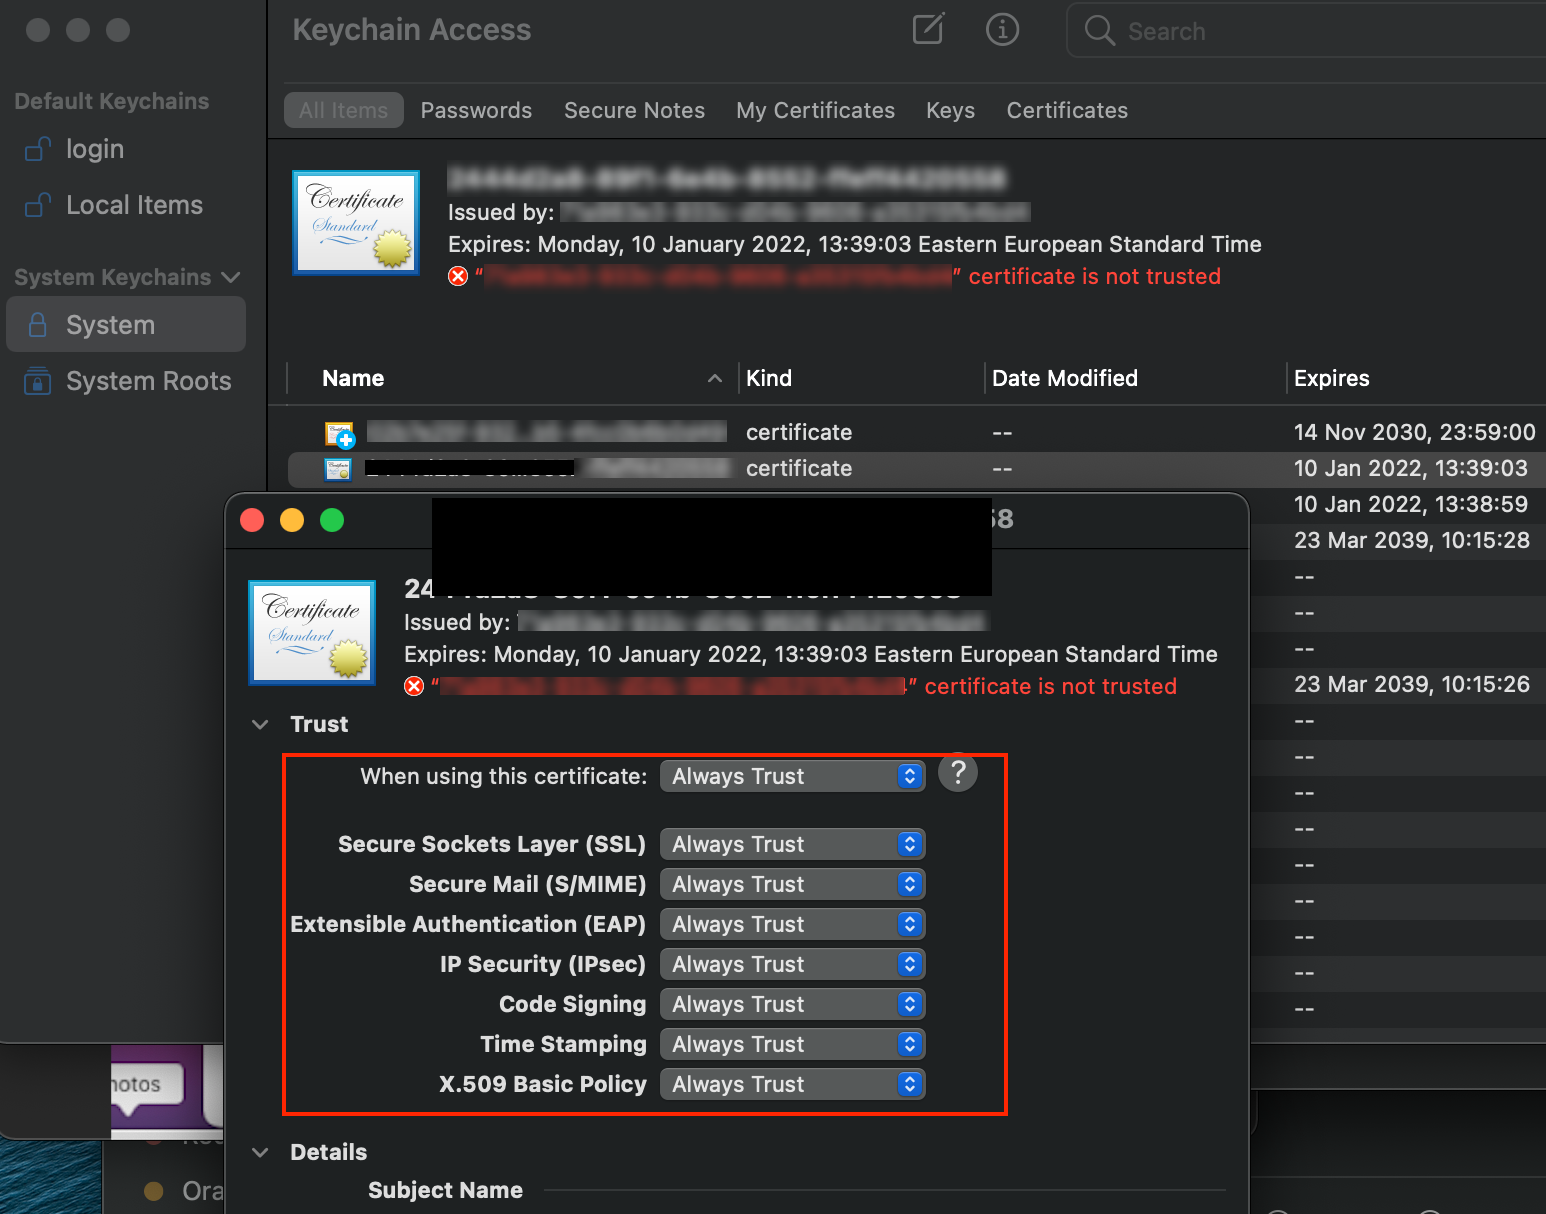
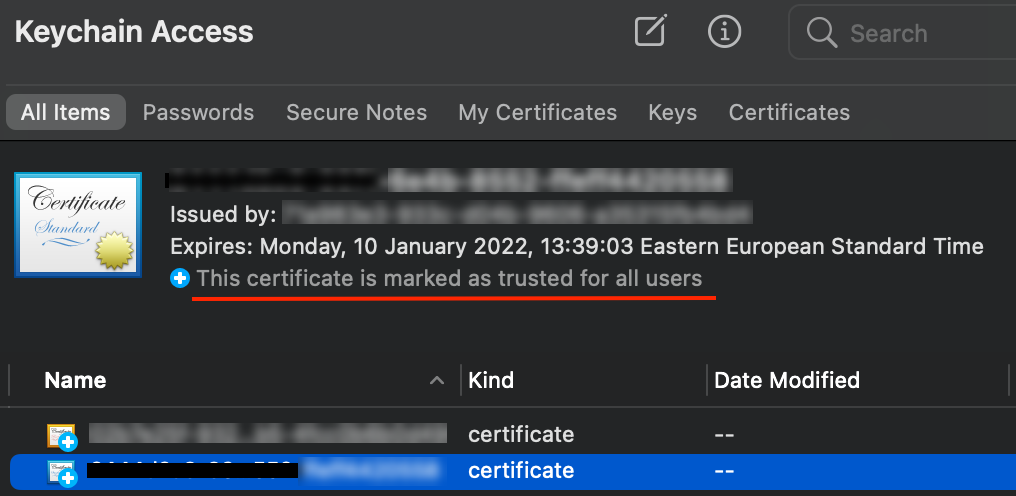
- In Keychain Access, double-click on the certificate. In the Trust section, choose the Always Trust option.
- The certificate is marked as Trusted.
Priyanka Bhotika
Comments