Overview
While facing Webadmin access issues in a Hyper-V environment, it might be necessary to re-configure the network adapters' settings. The virtual switches need to be added with an appropriate IP configuration.
This article provides information on how to configure network interfaces in Hyper-V settings.
Solution
- Right-click the Kerio Control VM to switch it off.
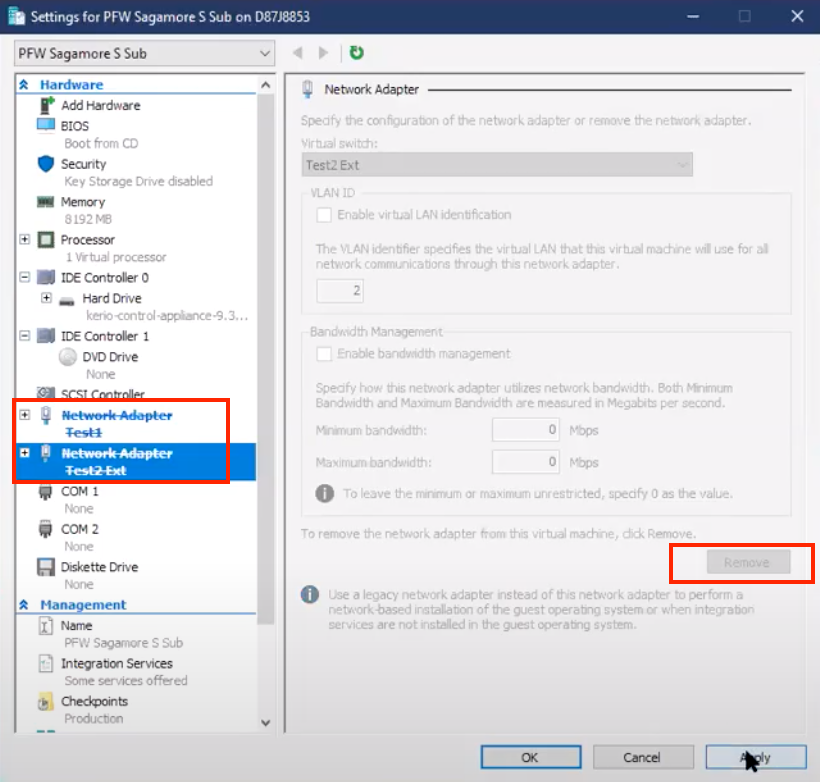
- Select your Kerio Control VM -> right-click on it and choose Settings. Remove all the current network adapters. Click Apply to save changes.
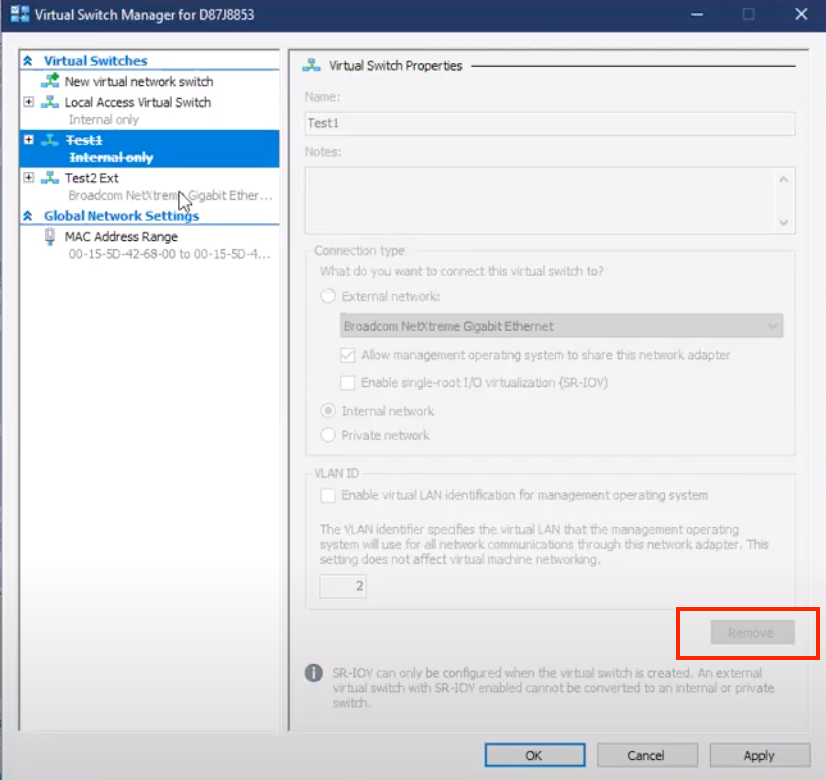
- In Virtual Switch Manager settings, remove both internal and external adapters.
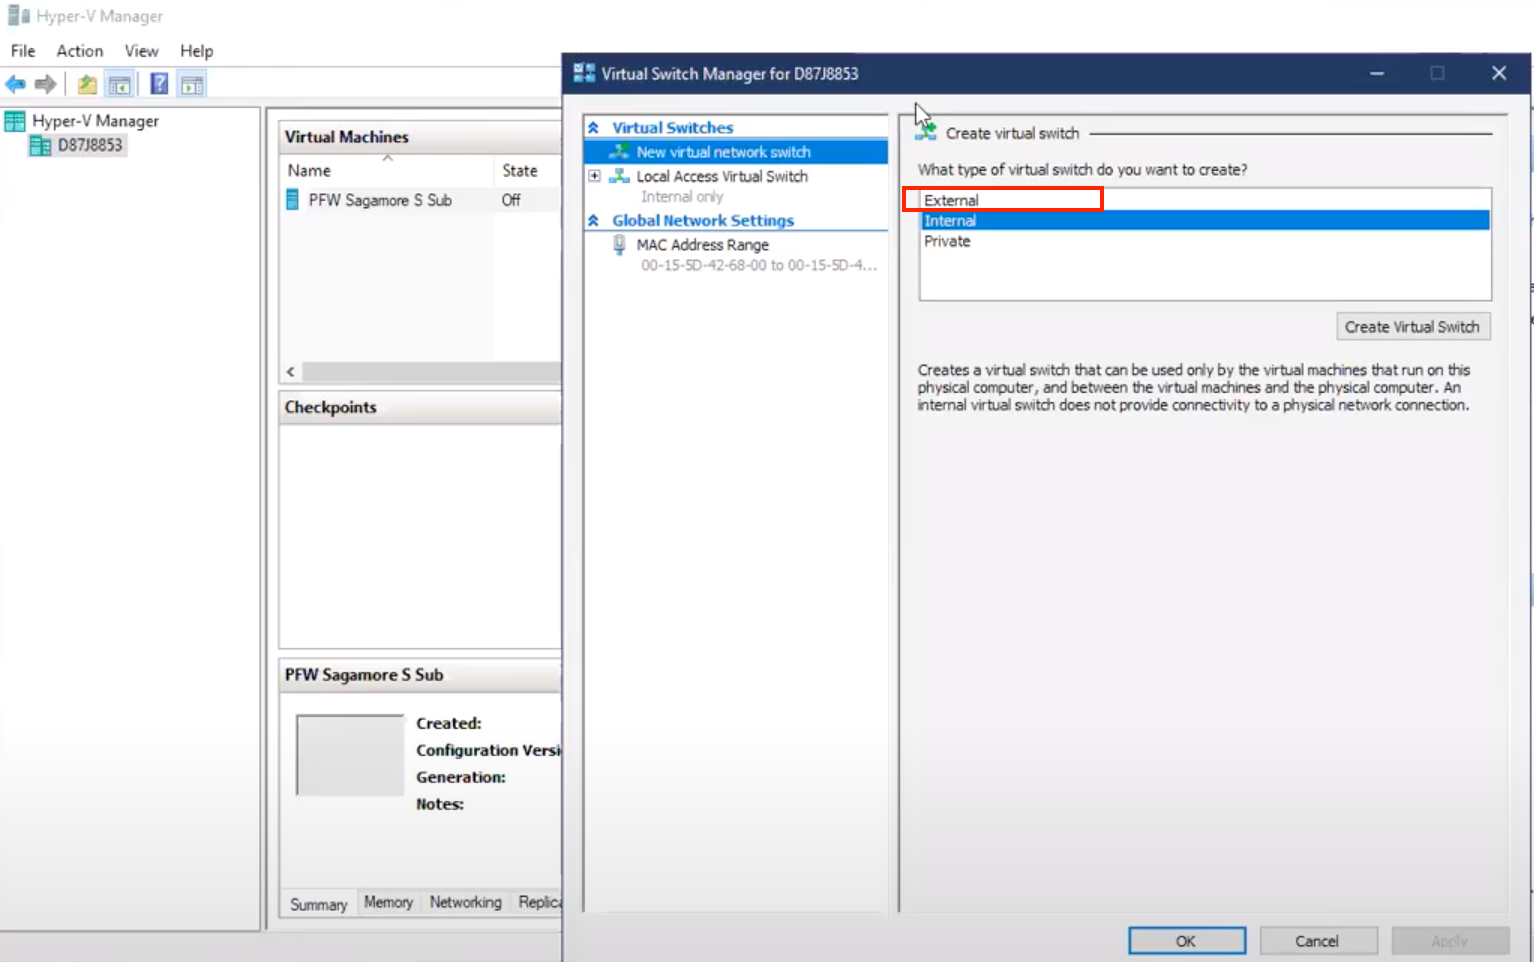
- On the same screen, create a new virtual network switch (external goes first, internal afterward).
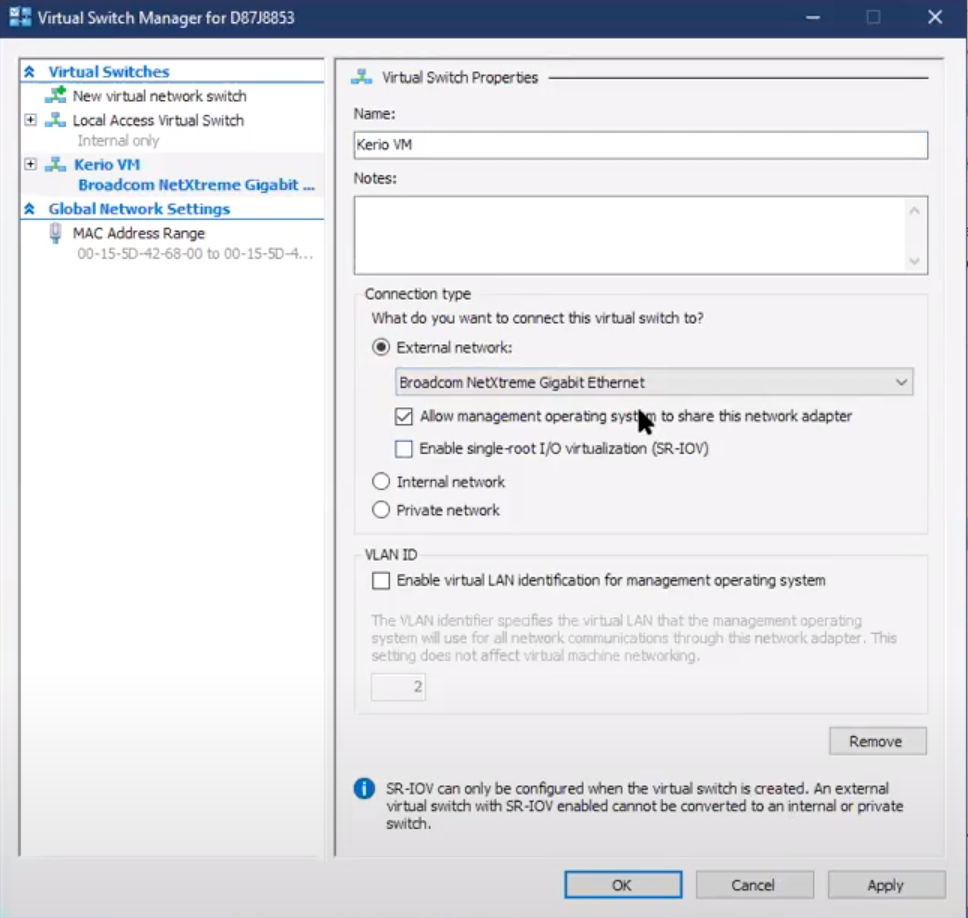
- Choose External Network and select the necessary PC adapter (i.e. Broadcom Gigabit Ethernet). Enable "Allow management operating system to share this network adapter".
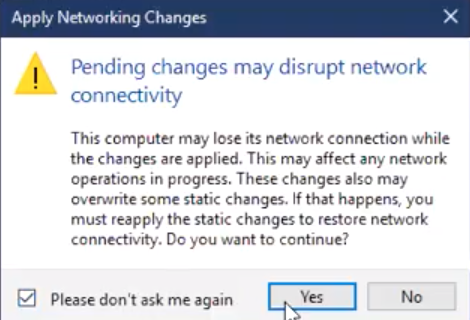
- Click Yes to confirm the network changes.
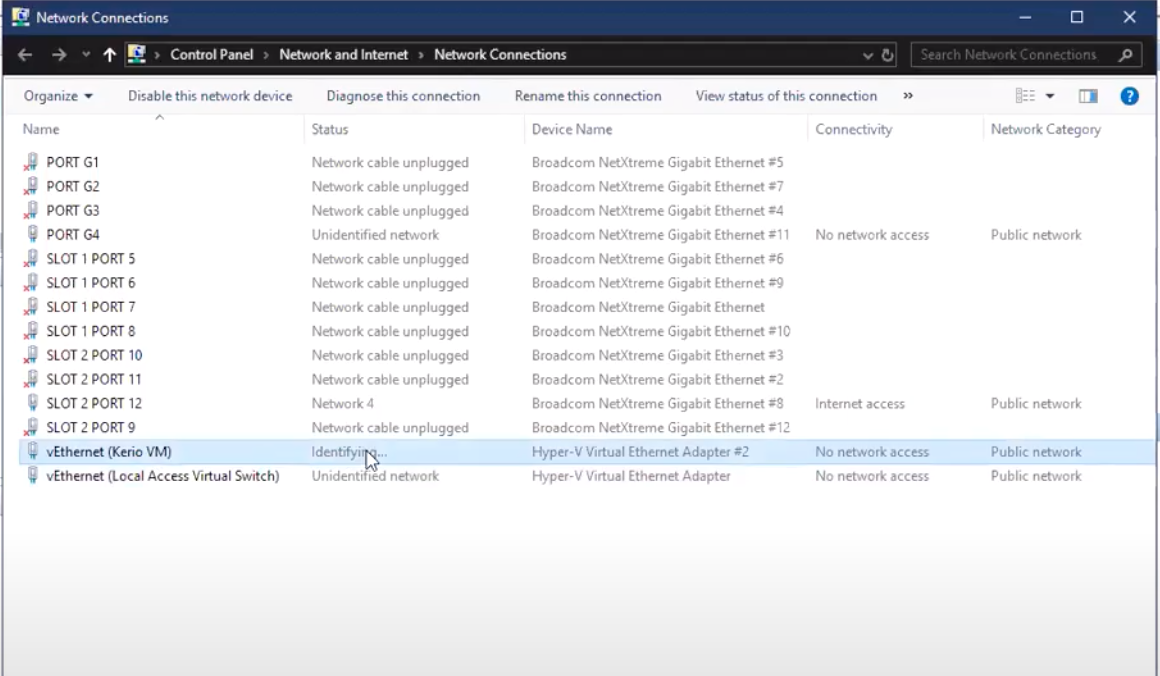
- The Kerio VM adapter will appear in the Control Panel -> Network and Internet -> Network Connections.
- Boot up Kerio Control VM.
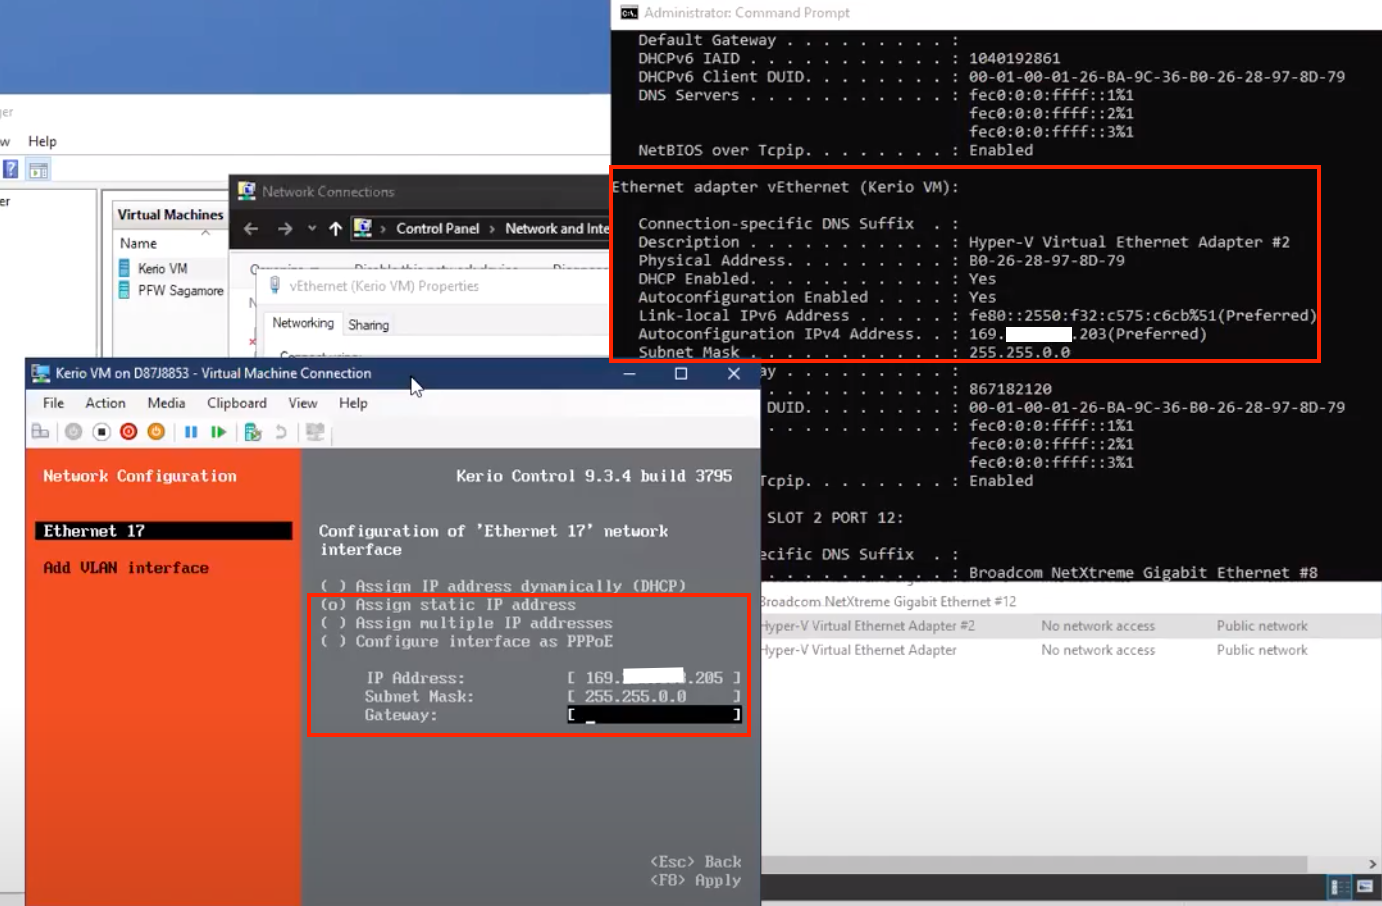
- Open the command prompt and verify the current IP address assignment by executing
ipconfig /allcommand. Locate Kerio VM adapter settings -> Autoconfiguration IPv4 address field.
In Kerio Control Virtual console, enter the Admin password and choose Network Configuration. Select the external adapter and choose "assign static IP address". Specify IP address slightly different to the reported in command prompt (x.x.x.205 instead of x.x.x.203) and appropriate Subnet Mask. Leave gateway value blank.
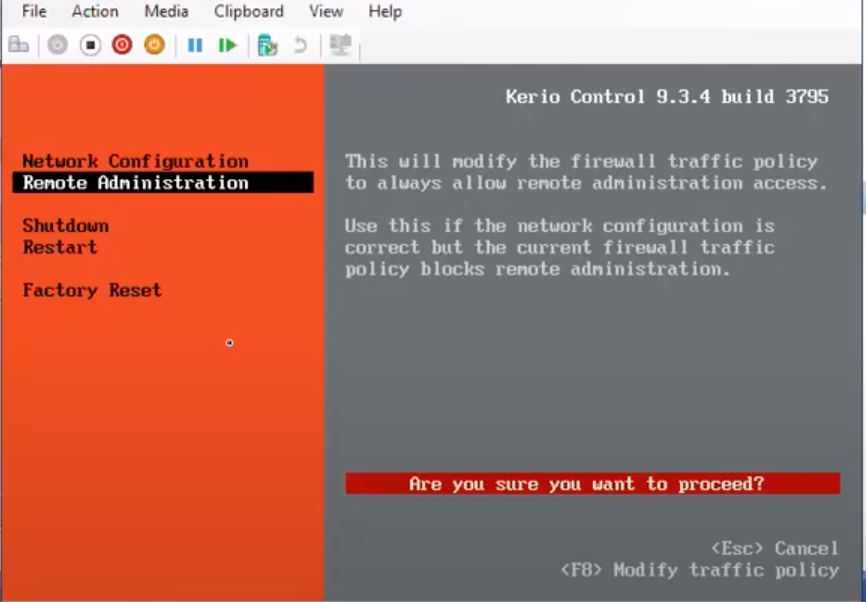
- In Kerio Control Virtual console, choose Remote Administration and press F8 to confirm traffic policy modification.
- Repeat steps 4-6 to set up internal network adapter settings. The internal network can be assigned an automatic IP address configuration (DHCP) in the console's Network Configuration.
Testing
Open the Webadmin console (https://external_ip:4081/admin) in the browser to verify it is accessible. Open Traffic Rules section to make sure Remote administration traffic rule is presented.

Priyanka Bhotika
Comments